1. How to open the Dashboard Marketing in dotBizX.Com?
To do it, you click on Marketing (1) menu => Then you can see the Dashboard Marketing like Illustration 01 bellows.
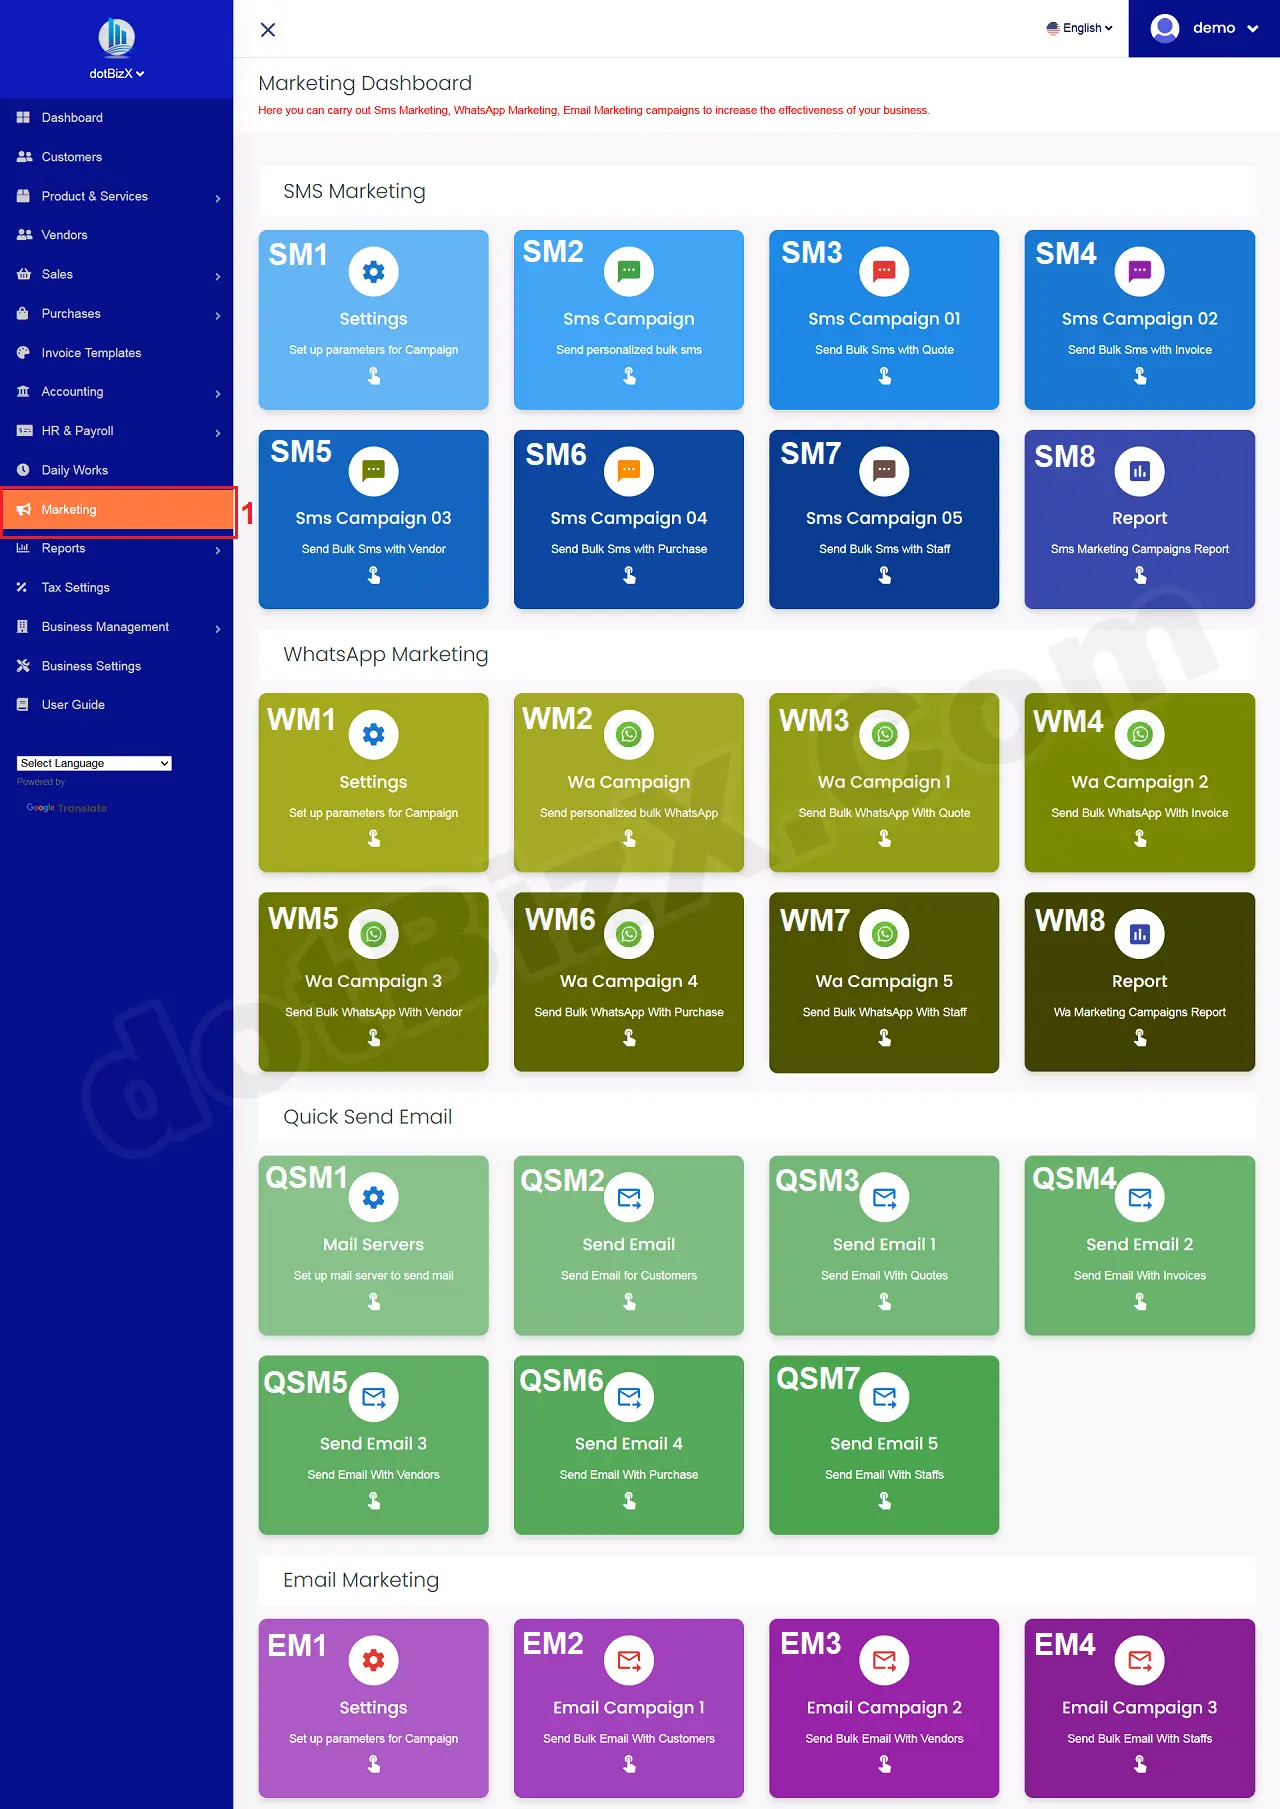
Illustration 01: Interface of Dashboard Marketing
2. How to open WhatsApp Marketing Settings Dashboard in dotBizX.Com?
In WhatsApp Marketing area of the Marketing Dashboard like Illustration 01 above, you click on Settings (WM1) button => Then you can see the WhatsApp Marketing Settings Dashboard like Illustration 02 bellows.
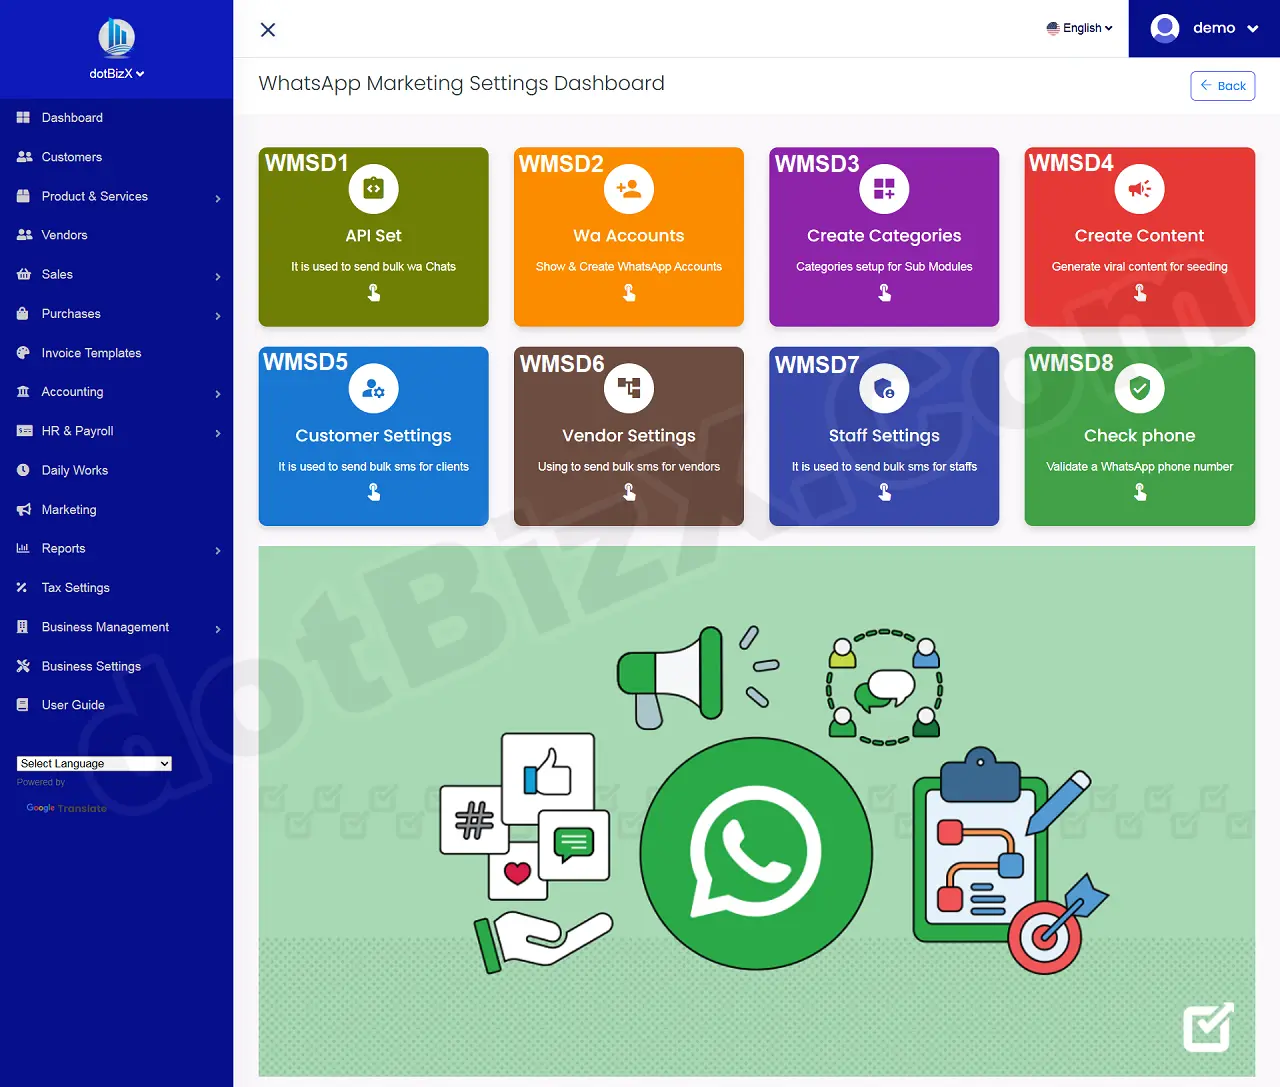
Illustration 02: Interface of WhatsApp Marketing Settings Dashboard
3. How to setup the SMS GateWay API for dotBizX.Com?
In the WhatsApp Marketing Settings Dashboard like Illustration 02 above, you click on API Set (WMSD1) button => Then you process it like SECTION 3 of 10.11. Sms Marketing Setup.
4. How to setup WhatsApp Server/Wa Accounts for dotBizX.Com?
4.1. Step 1: Open List of Wa Accounts
In the WhatsApp Marketing Settings Dashboard like Illustration 02 above, you click on Wa Accounts (WMSD2) button => Then you can see list of Wa Accounts like Illustration 03 bellows.

Illustration 03: List of Wa Accounts - WhatsApp Account
* Notes:
+ WhatsApp Server (2) box: It has only values when you finish 3rd SECTION above.
+ Add Accounts (3) button: It's used to add WhatsApp Server for dotBizX.Com.
+ Action (4) button: When you click on this button so you can see 5th option.
+ Delete (5) option: It's used to delete a Wa Account (WhatsApp Account).
+ Status Colunm: If It has value that's Connected so you can send WhatsApp Chats in bulk.
4.2. Step 2: Begin Add a new Wa Account
In Create New WhatsApp Account form like Illustration 03 above, you need choose a WhatsApp Server in WhatsApp Server(6) box => Next you click on Add Account (7) button => After that you can see the QR Code like Illustration 04 bellows.
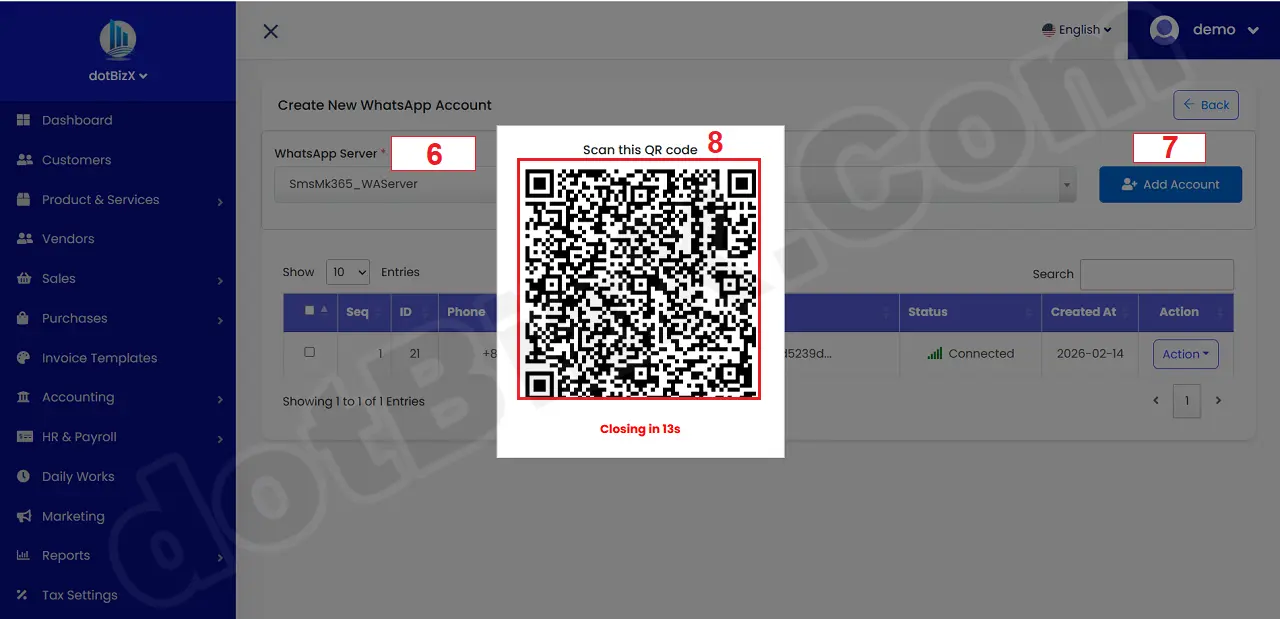
Illustration 04: Create New WhatsApp Account Form
4.3. Step 3: Open WhatsApp Application from your android Mobile with QR Code model
Now you open your android mobile via Illustration 05 bellows, when it shows Scan QR Code then you give your camera to QR Code like Illustration 04 above => When It finish so you can see a new Wa Account in the table bellows like Illustration 03 above.
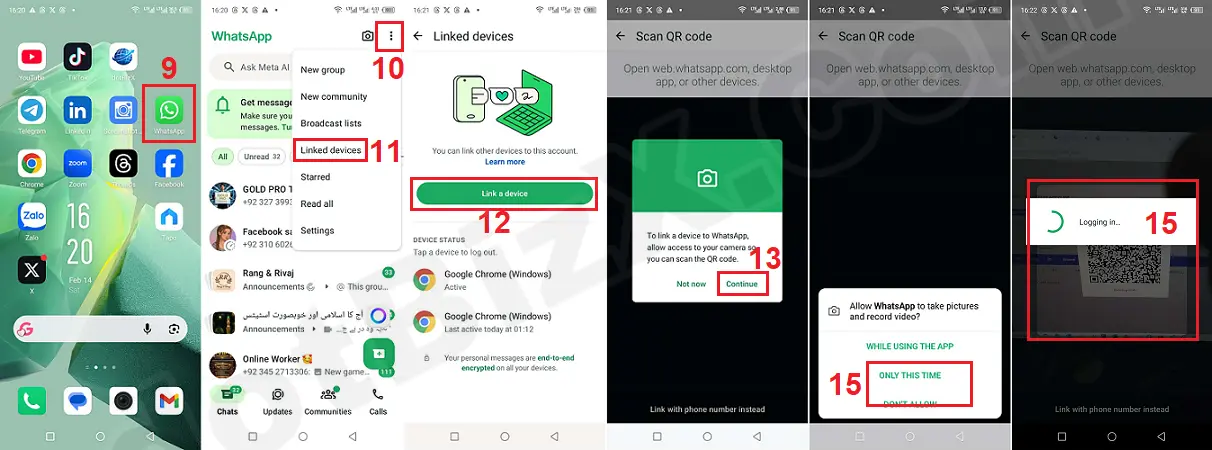
Illustration 05: Open WhatsApp APP in Android Mobile with scan QR Code model
5. How can I check whether a phone number has been registered for a WhatsApp account?
In the WhatsApp Marketing Settings Dashboard like Illustration 02 above, you click on Check Phone (WMSD8) button => Then you can see Validate a WhatsApp phone number Form like Illustration 06 bellows.
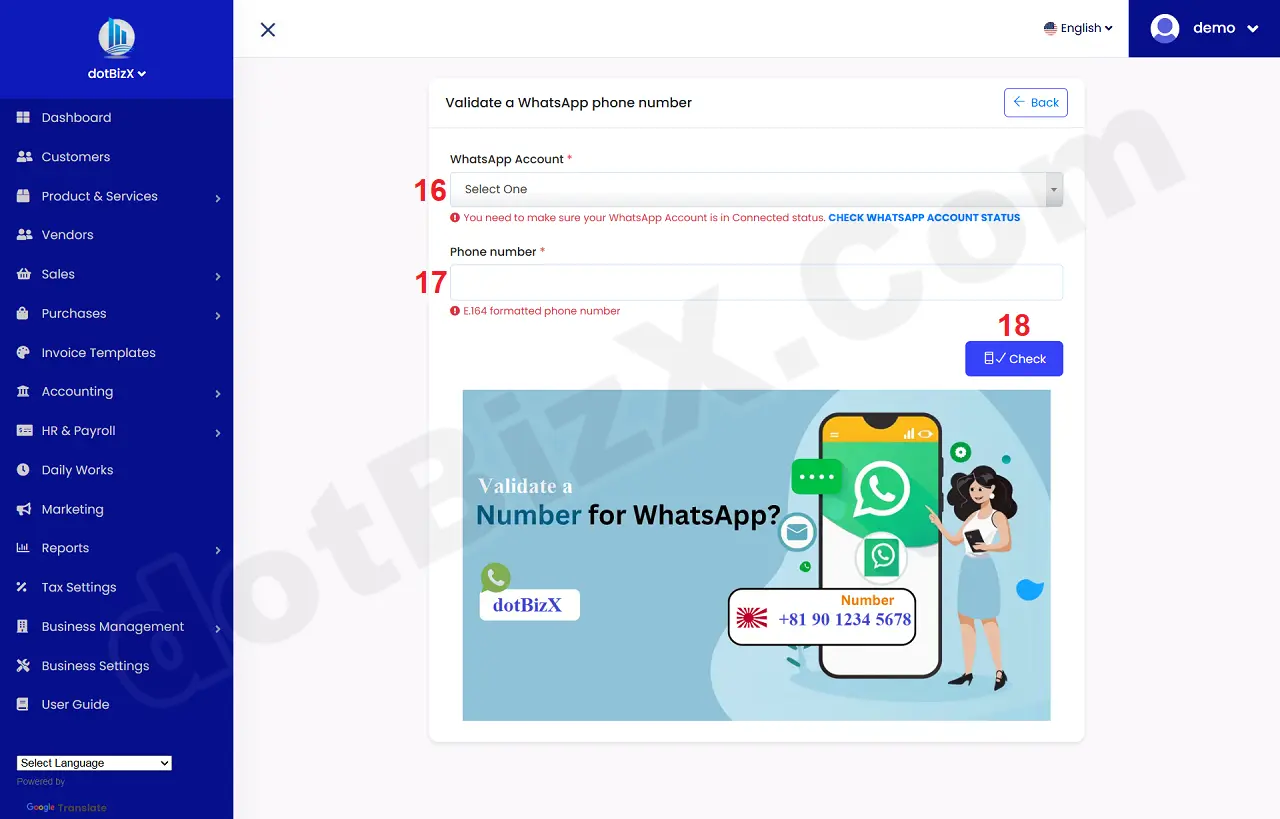
Illustration 06: Validate a WhatsApp phone number Form
Next, you need choose an Account from WhatsApp Account (16) box => next you input your mobile that you need to check into Phone Number (17) box => Final, you click on Check (18) button to get the check result.
* Notes: Phone Number has to have E.164 formatted. For Example: +81 123456789
6. Notes:
6.1. How to create categories?
In the WhatsApp Marketing Settings Dashboard like Illustration 02 above, you click on Create Categories (WMSD3) button => Then you can create categories.
You can also do it via 9.1. Categories Management in the user guide of dotBizX.Com.
6.2. How to create contents?
In the WhatsApp Marketing Settings Dashboard like Illustration 02 above, you click on Create Contents (WMSD4) button => Then you can create contents for your WhatsApp Marketing Campaigns.
You can also do it via 9.1. Categories Management in the user guide of dotBizX.Com.
6.3. How to create and customers management?
In the WhatsApp Marketing Settings Dashboard like Illustration 02 above, you click on Customer Settings (WMSD5) button => Then you can settings for your customer's data.
You can also do it via SECSION 4 of 10.1. Sms Marketing Settings in the user guide of dotBizX.Com.
6.4. How to create and Vendors management?
In the WhatsApp Marketing Settings Dashboard like Illustration 02 above, you click on Vendor Settings (WMSD6) button => Then you can settings for your Vendor's data.
You can also do it via SECSION 5 of 10.1. Sms Marketing Settings in the user guide of dotBizX.Com.
6.5. How to create and Staffs management?
In the WhatsApp Marketing Settings Dashboard like Illustration 02 above, you click on Staff Settings (WMSD7) button => Then you can settings for your Vendor's data.
You can also do it via SECSION 6 of 10.1. Sms Marketing Settings in the user guide of dotBizX.Com.