Steps to import employees in bulk from dotBizX.Com
1. Step 1: Open The Interface of Daily Works module
Click on Daily Works (1) menu => then you click on Staffs Import (DW13) tool like Illustration 01 bellows.
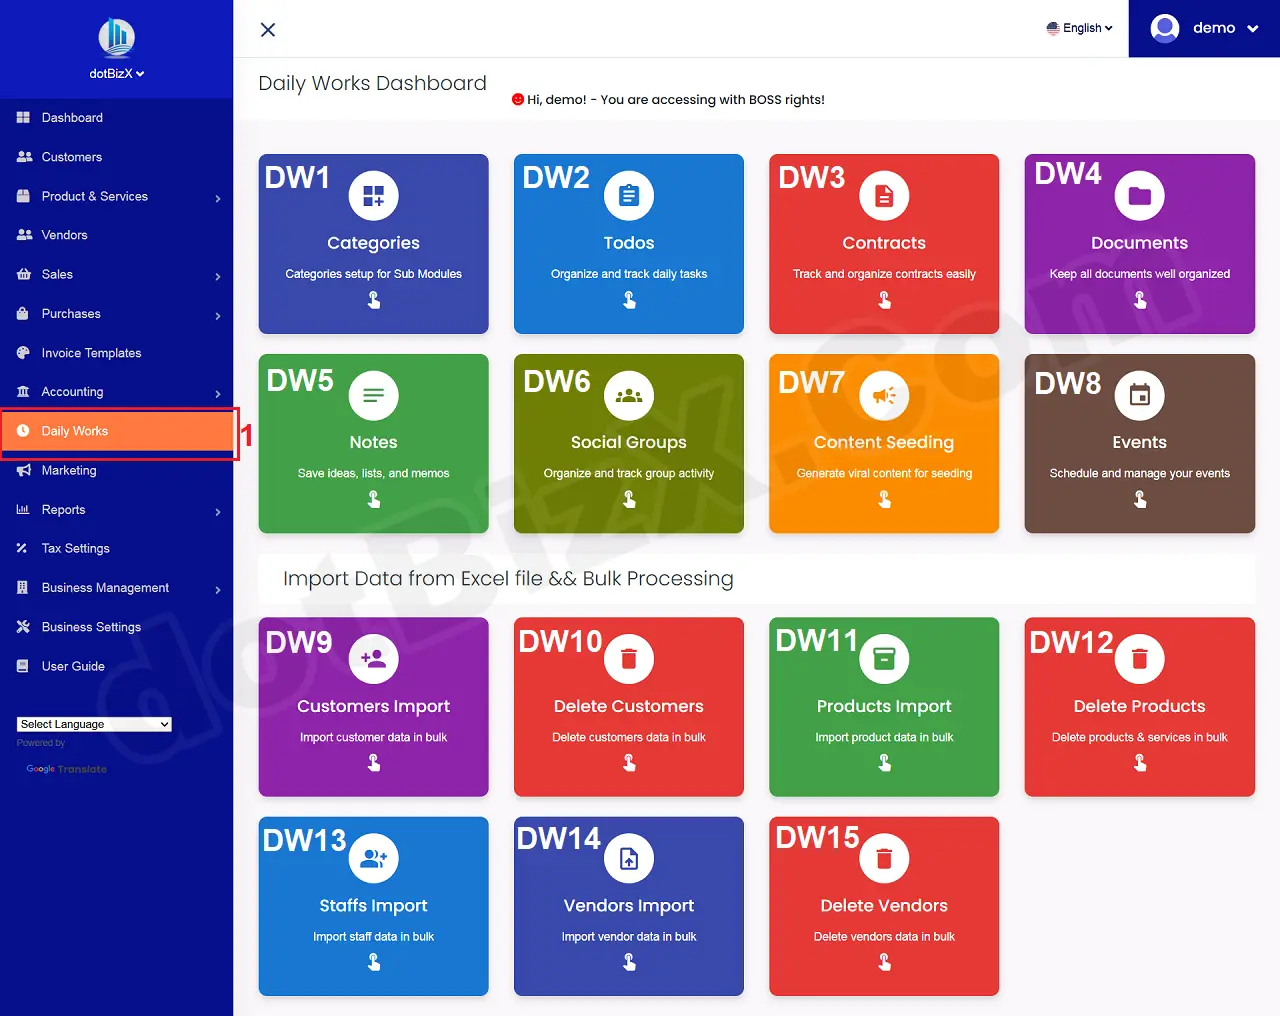
Illustration 01: The Interface of Daily Works Module
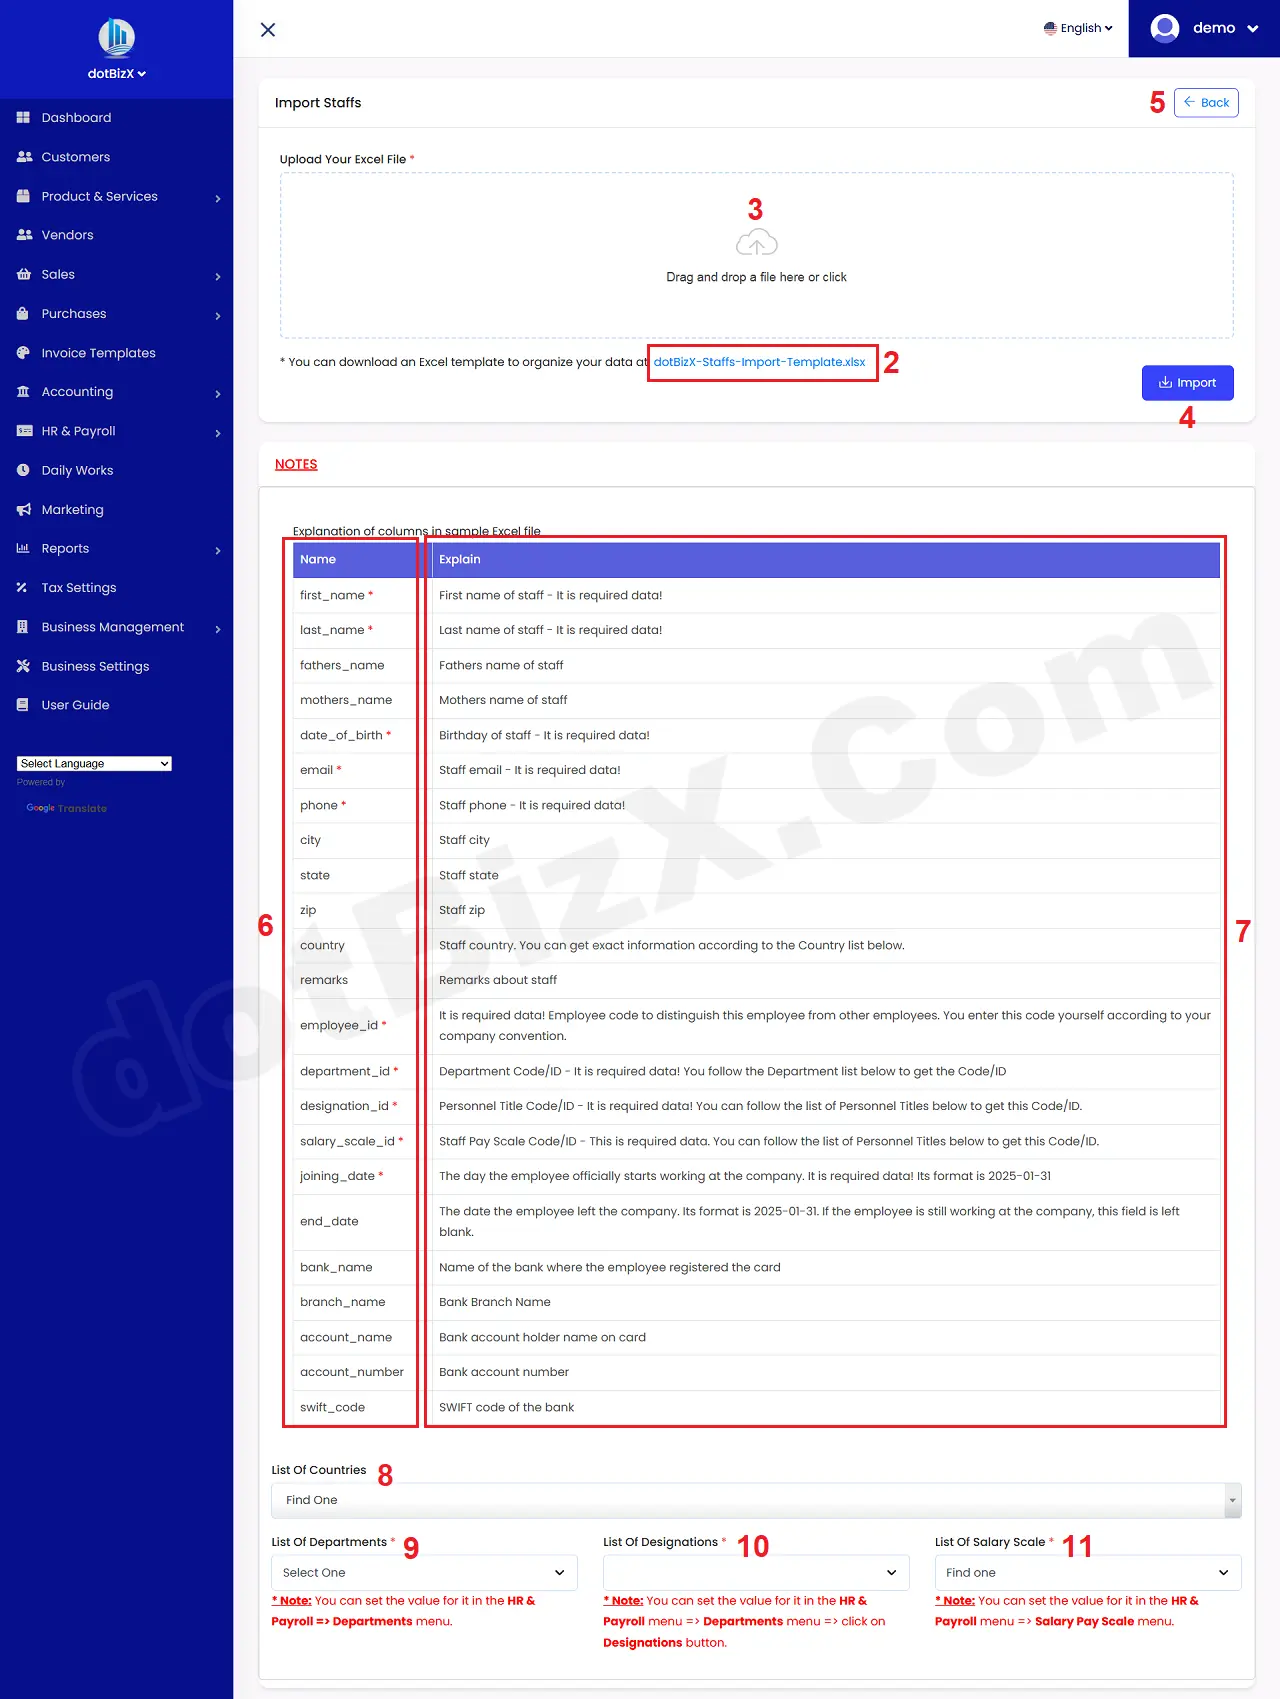
Illustration 02: The interface of import employees
2. Steps 2: Organize the data into an Excel file
Now you click on 2nd box to download the Excel template file to your computer => next you delete all demo data from that Excel file => Then you input all information about your employees into that Excel File.
When you finish with that Excel file so you click on Upload Your Excel File (3) button like Illustration 02 above to upload your Excel file => Final, you click on IMPORT (4) button to finish.
* Notes:
+ The columns in the sample Excel file will be explained in detail in the red 6th areas and 7th area as shown in illustration 02 above.
+ Cells marked with a red asterisk (*) are mandatory.
+ The data for the COUNTRY column in the Excel file can be obtained from the List of Countries (8) box as shown in Illustration 02 above. When you click on it, a list of Countries will appear. You select the value that matches the customer's Country. From this value, you will know exactly which data to retrieve. For example: If the value you select in the List of Countries (8) box is: Japan => Then the value to fill in the COUNTRY column in the Excel file is: Japan.
+ employee_id colunm: For this column, you need to set the data according to the formula: Your Brand Name-Department Name-00001.
For example:
- For employees in Sale Department: dotBizX-Sale-00001; dotBizX-Sale-00002; dotBizX-Sale-00003...
- For employees in HR Department: dotBizX-HR-00001; dotBizX-HR-00002; dotBizX-HR-00003...
+ To get the department_id, you need click on the List Of Departments box (9) as shown in Illustration 02 above. In the displayed list, you will see department_id. For example: If the value is: ID(6) - Name(Sale) then 6 is the department_id.
If this list is empty, follow the instructions in the following article to create a Department: 8.1.1. Departments Management.
+ To get the designation_id, you need click on the List Of Designations box (10) as shown in Illustration 02 above. In the displayed list, you will see designation_id. For example: If the value is: ID(13) - Name(Sales Executive) then 13 is the designation_id.
If this list is empty, follow the instructions in the following article to create a Designation: 8.1.1. Departments Management.
+ To get the salary_scale_id, you need click on the List Of Salary Scale box (11) as shown in Illustration 02 above. In the displayed list, you will see salary_scale_id. For example: If the value is: ID(9) - Grade 2 ($650.00) then 9 is the salary_scale_id.
If this list is empty, follow the instructions in the following article to create a Salary Scale: 8.1.2. Salary Scales Management.