1. How to show list of invoices in dotBizX.com?
To do it, you click on Sales (1) menu => then you click on Invoices (2) option => Now you can see list of invoices like Illustration 01 bellows.
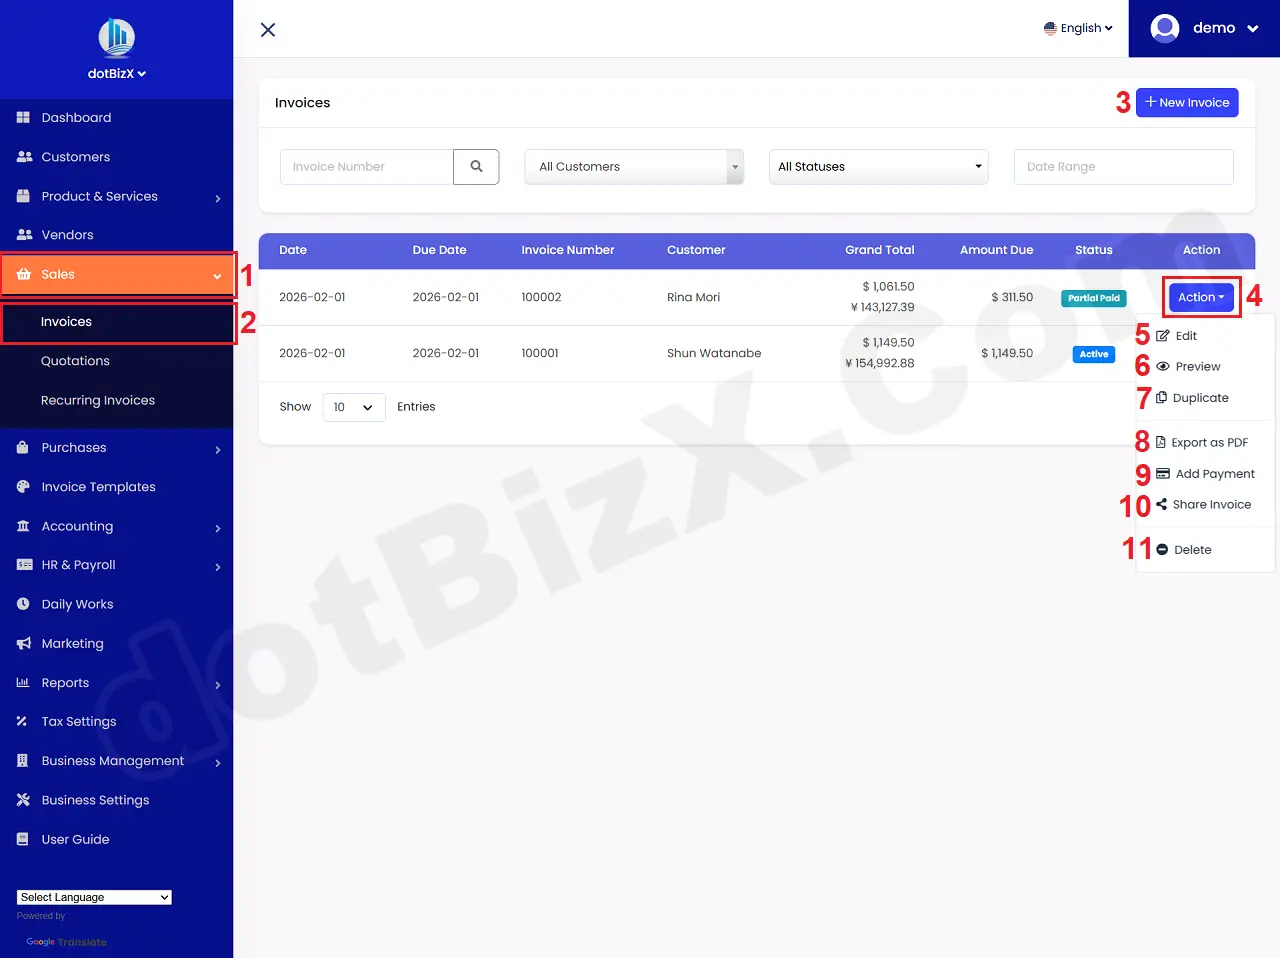
Illustration 01: List of Invoices
* Notes:
+ Action (4) button: Click on this button to show 5th - 11th options.
+ Edit (5) option: It's used to modify an existing Invoice.
+ Preview (6) option: It's used to show an existing Invoice.
+ Duplicate (7) option: It's used to duplicate an existing Invoice.
+ Export to PDF (8) option: It's used to export an existing Invoice to PDF file.
+ Add Payment (9) option: It's used to pay for an existing Invoice.
+ Share Invoice (10) option: It's used to generate a link of an existing Invoice. Then you can shere the link of Invoice for you customers.
+ Delete (11) option: It's used to delete an existing Invoice.
2. How to create a new Invoice?
In list of Invoices like Illustration 01 above, you click on New Invoice (3) button => in Add New Invoice Form like Illustration 02 bellows, you input all things for your Invoice => Final, you click on Save Invoice (18 or 34) button to finish.
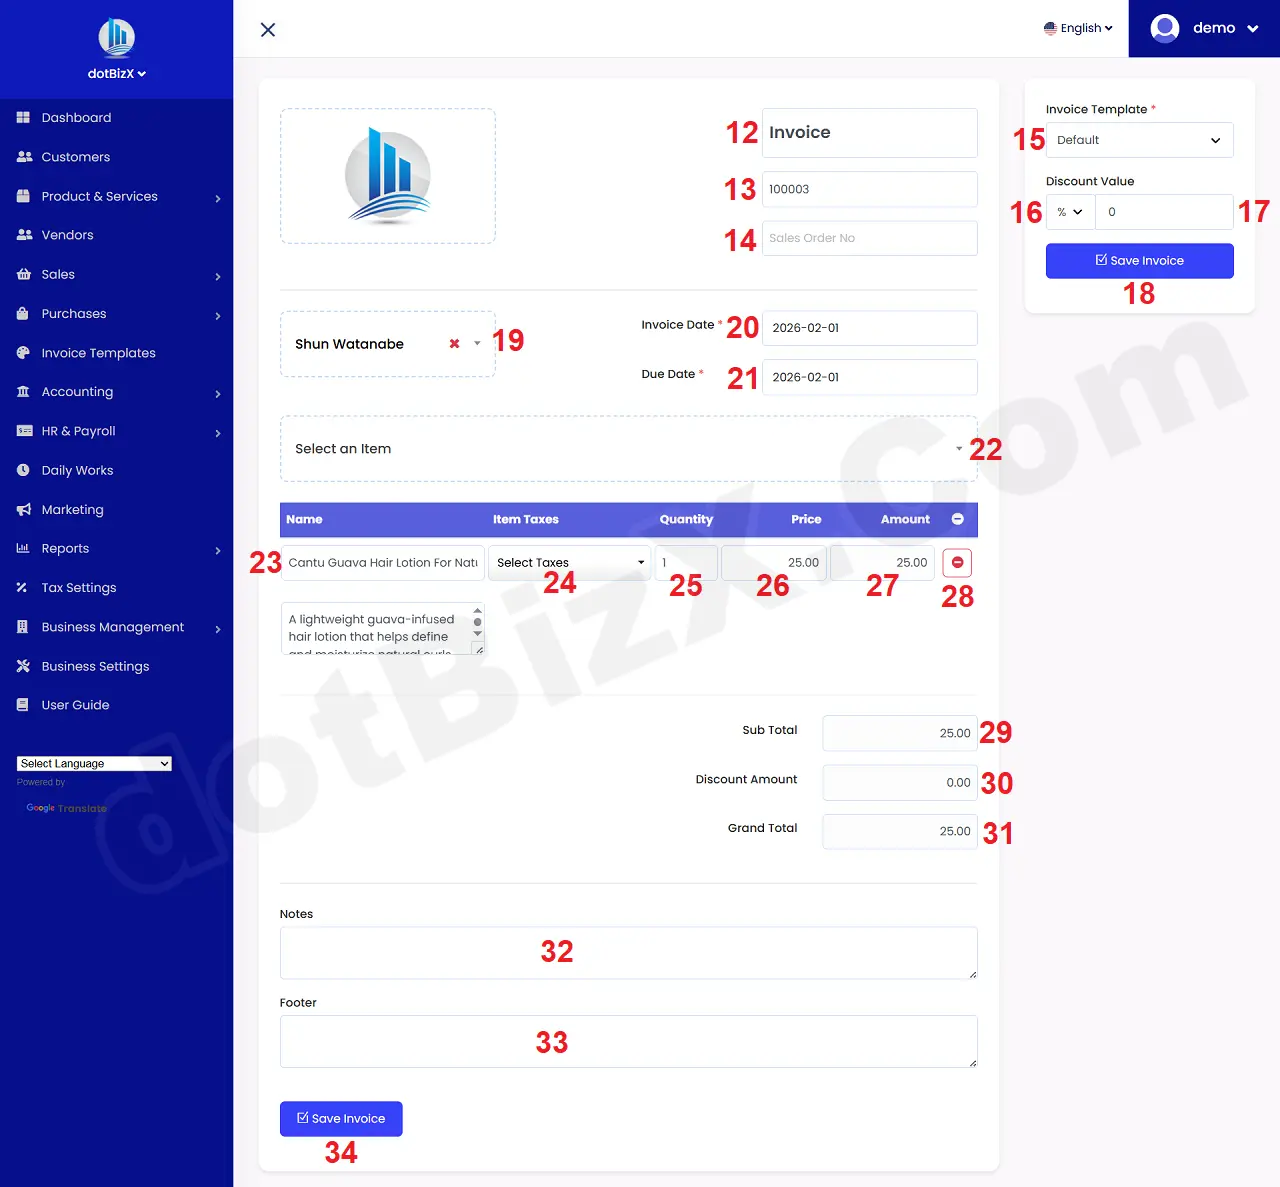
Illustration 02: Add New Quotations Form
* Notes:
+ Invoice Title (12) box: You can change it for your Invoice.
+ Invoice Number (13) box: You can change it for your Invoice. Or you can use It's default value that's generated by dotBizX.Com.
+ Sale Order No (14) box: You can leave this field blank. If the Invoice was created based on a previous sales order (SO), enter the SO here.
+ Choose Customer (19) box: You click on this box to choose the customer for your Invoice.
+ Select an Item (22) box: You click on this box to choose the Item for your Invoice. After that that item's show in Table bellows.
+ Item Taxes (24) Column: You choose the tax that's suitable with that item.
+ Quanlity (25) column: You can change the quanlity of items for your Invoice.
+ Price (26) column: You can change the price for your Invoice.
+ Amount (27) column: You can change the amount for your Invoice.
+ 28th Icon: Click it to delete Item.
3. How to show an existing Invoice?
In list of invoices like Illustration 01 above, you click on Action (4) button that's suitable with your Invoice which you want to do => then you click on Preview (6) option => after that you can see the Invoice detail form like Illustration 03 bellows.
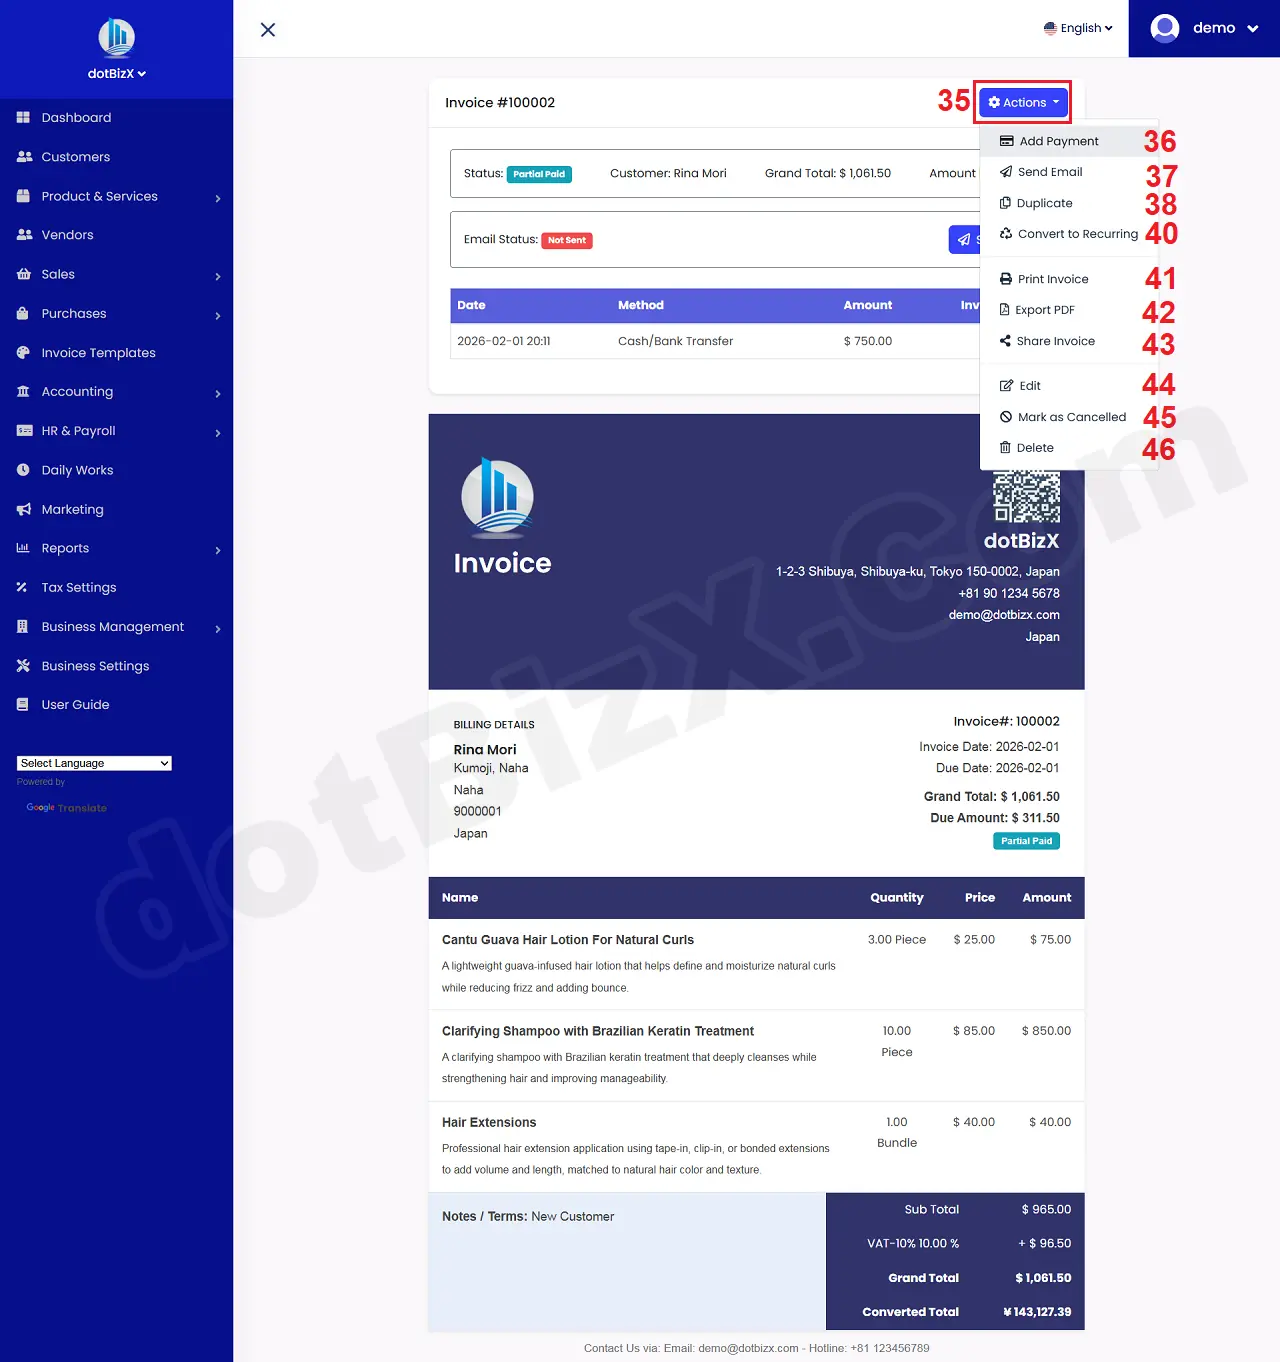
Illustration 03: Invoice Detail Form
* Notes:
+ Add Payment (36) option: It's used to pay for Invoice.
+ Send Email (37) option: It's used to send Invoice for your customer via email.
+ Duplicate (38) option: It's used to duplicate from this invoice.
+ Convert to Recurring (40) option: It's used to convert this invoice to recurring invoice. Recurring invoices are recurring invoices – invoices that are automatically generated and repeated at fixed intervals without needing to be manually created each time.
+ Print Invoice (41) option: It's used to print Invoice.
+ Export PDF (42) option: It's used to Export Invoice to PDF File.
+ Share Invoice (43) option: It's used to generate link for Invoice. Then you can use that link to share for your customers.
+ Edit (44) option: It's used to modify this Invoice.
+ Make as Cancelled (45) option: It's used to cancel this Invoice.
+ Delete (46) option: It's used to delete this Invoice.
4. How to share an existing Invoice for my customers?
In list of Invoices like Illustration 01 above, you click on Action (4) button that's suitable with your Invoice which you want to do => then you click on Share Invoice (10) option => after that you can see the Get share link form like Illustration 04 bellows.

Illustration 04: Get share link
Now you can share this link for your customers via email, facebook messenger, linkedin, x.com...your customers can see their Invoice without login into dotBizX.Com.
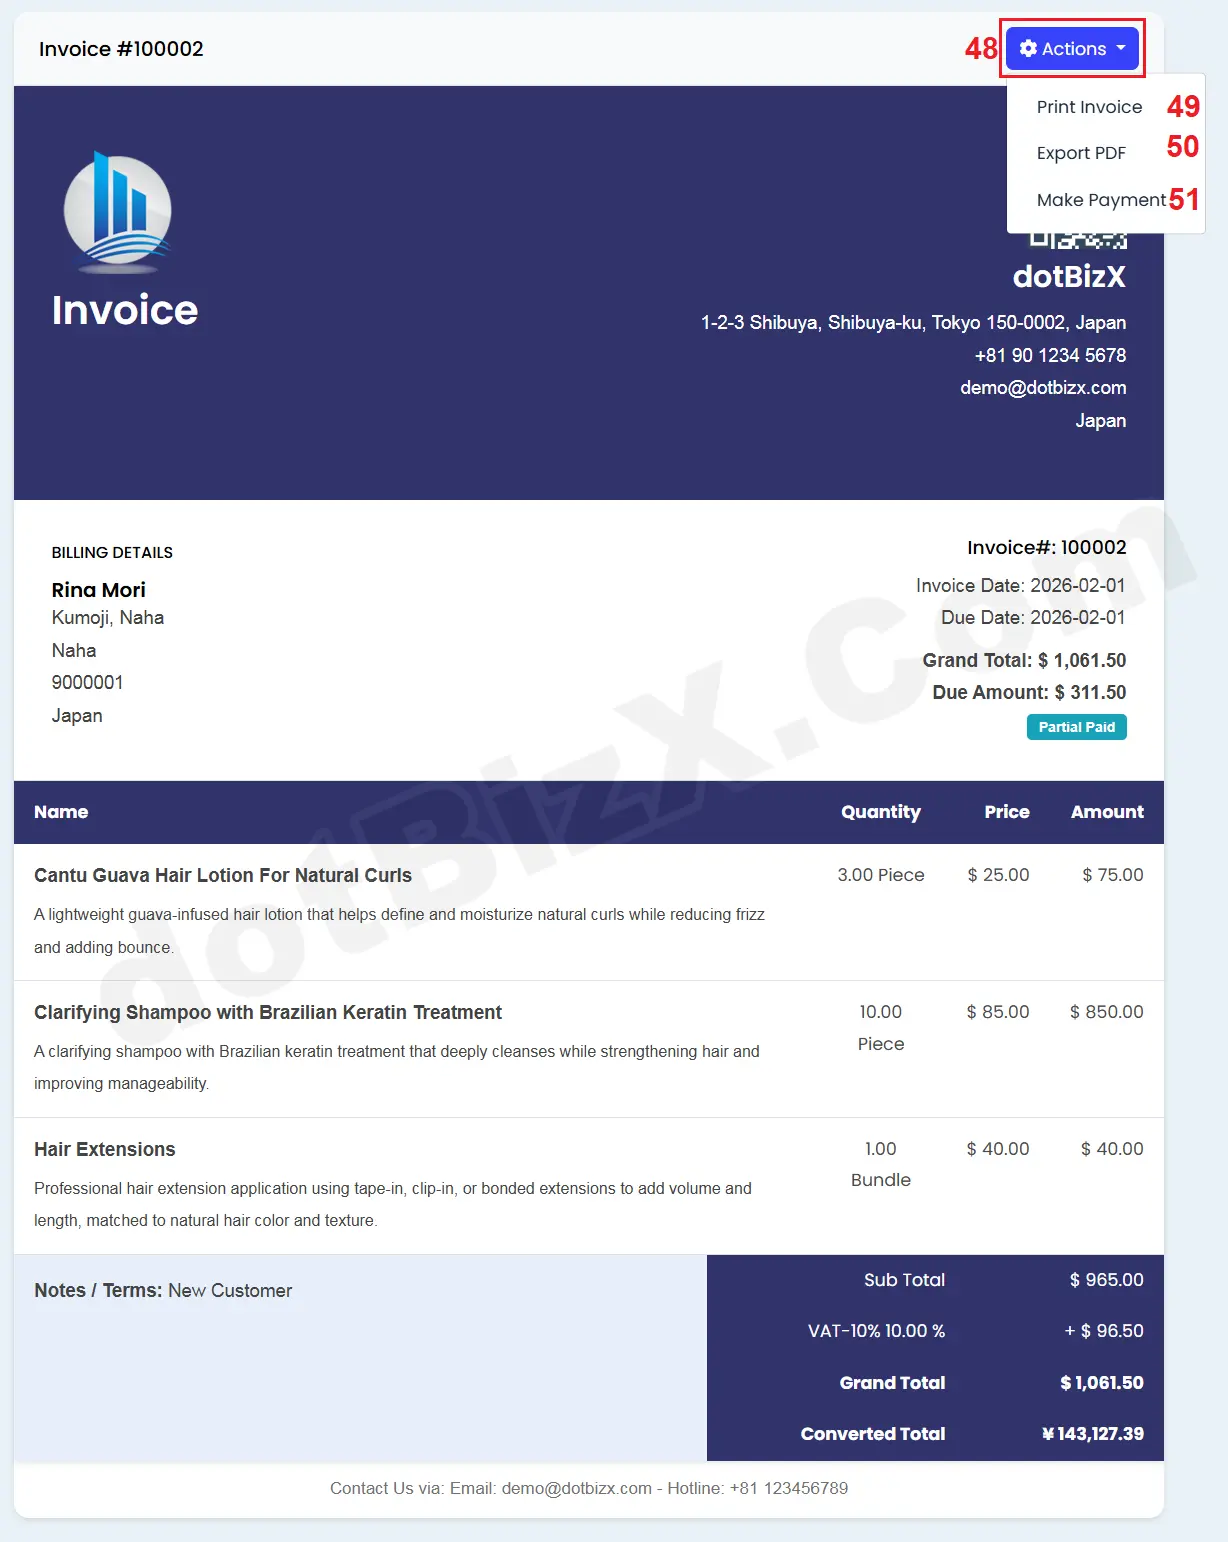
Illustration 05: Share Invoice for Customer
When your customers get that Invoice, they can print Invoice or export it to PDF file or Pay for their Invoice via Make Payment (51) option like Illustration 05 above.
5. How to add payment for an existing invoice?
In list of Invoices like Illustration 01 above, you click on Action (4) button that's suitable with your Invoice which you want to do => then you click on Add Payment (9) option => In Add Invoice payment Form like Illustration 06 bellows, you need input all things for Payment => Final, you click on Submit (60) button to finish.
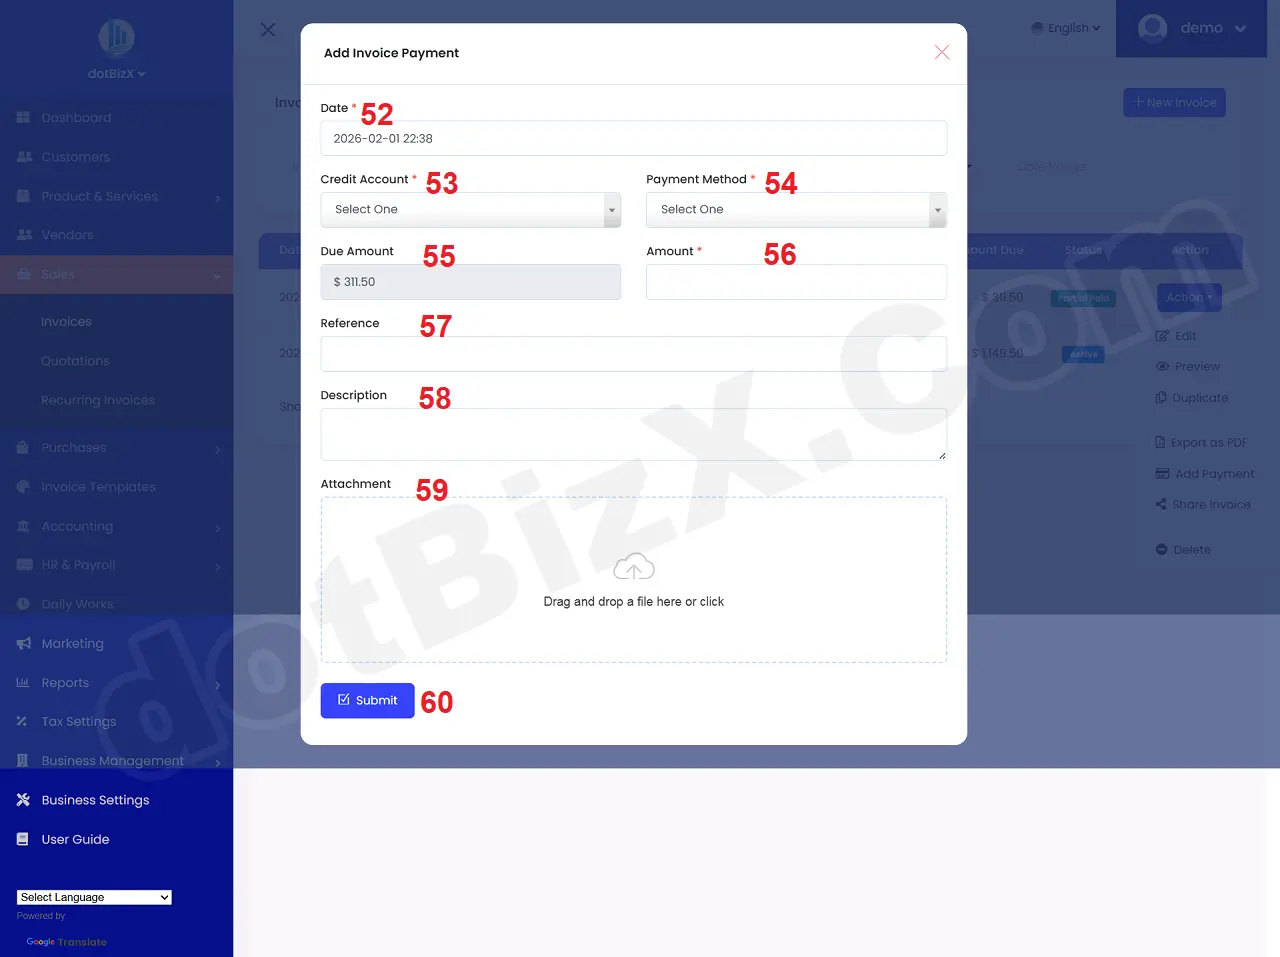
Illustration 06: Add Payment for Invoice
*Notes:
+ Cells marked with a red asterisk (*) are mandatory.
+ Credit Account (53) box: You need choose an credit account for this payment. If this box hasn't value so you need click on Add New option from this box to create a new debit account that's suitable for this payment (you can do it like 7.4. Manage Transaction Methods in the user guide of dotBizX.Com).
+ Payment Method (54) box: You need choose an payment method for this payment. If this box hasn't value so you need click on Add New option from this box to create a new payment method that's suitable for this payment (you can do it like 7.1. Manage Bank Accounts & Accounts in the user guide of dotBizX.Com).
+ Amount (56) box: You need input the value of Due Amount (55) box here to finish payment for that Invoice. If you enter a value less than the value in the Due Amount box (55), you have only paid a portion of that Invoice and thus, you will have to pay the remaining amount in the future.
+ Reference (57) box: You need to enter the "identifying trace" of the payment for this Invoice. For example: PAY-INV-1023.
+ Attachment (59) option: You need click on this option to upload your proof for your payment. It can be Bill or invoice...
6. How can customers pay their bills using the Invoice link?
When your customer open their invoice to see their invoice detail like Illustration 05 above, then they click on Actions (48) button => Next click on Make Payment (51) option => So They see the payment form like Illustration 07 bellows.
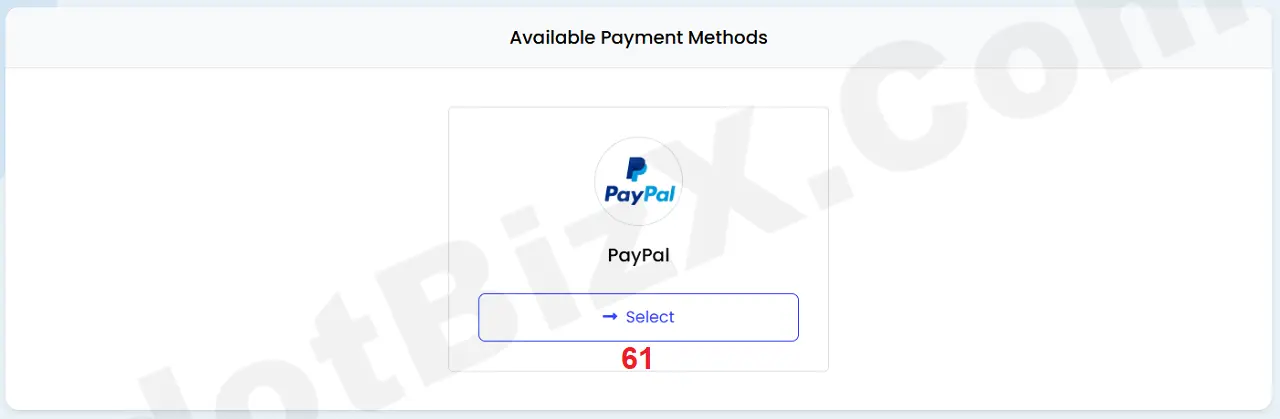
Illustration 07: Make Payment for Invoice by your Customer
Next they have to choose the payment method, for example: click on ->Select(61) button of paypal method => Next, they follow the on-screen payment steps to complete the payment of that invoice.
* Notes:
+ The Payment Methods's Installed like 1.3. Install and Update Business Information (Secsion 3.4. Payment Settings) in the user guide of dotBizX.Com
7. How to convert an existing invoice to recurring Invoice?
In Invoice Detail Form like Illustration 03 above, you click on Actions (35) button => then you click on Convert to recurring Invoice (40) option => In Update Recurring Invoice Form like Illustration 08 bellows, you need input all things for It => Final, you click on Update (68 or 87) button to finish.

Illustration 08: Update Recurring Invoice Form
*Notes:
+ Cells marked with a red asterisk (*) are mandatory.
+ Sale Order No (63) box: You can leave this field blank. If the Invoice was created based on a previous sales order (SO), enter the SO here.
+ Next Invoice Date (70) box: You need input Next Invoice Date for it.
This is the next time the system will automatically generate an invoice. After this date, the system will: Create a new invoice, Assign an invoice number, (Depending on the configuration) Send it to the customer. For example: Next Invoice Date = 2026-02-02 → On February 2nd, 2026, the system will create a new invoice.
+ Recurring End (71) box: You need input Recurring End Date for it.
This is the End Date of the recurring invoice cycle. After this date, the system will stop creating new invoices. For example: Recurring End = 2026-12-31 → Recurring invoices will only run until December 31, 2026, and then stop completely.
+ Recurring Every (72 + 73) box: You need input the suitable value for it.
This is the cycle number, indicating how often it repeats. It consists of two parts: a number (e.g., 7, 30, 1…) and a unit (Days / Weeks / Months…).
Common examples:
- Recurring Every 30 Days → Create one invoice every 30 days.
- Recurring Every 1 Month → Create one invoice every month.
- Recurring Every 7 Days → Create one invoice every week.
Practical example (easy to understand):
- Next Invoice Date: 2026-02-02
- Recurring Every: 1 Month
- Recurring End: 2026-06-02
👉 The system will generate invoices on:
- 02/02
- 02/03
- 02/04
- 02/05
- 02/06
→ Then it will automatically stop.
+ Due Date (65) box: You need choose the suitable value form it.
This is the Payment Due Date. It is used for: Tracking accounts receivable, reminding payments, Identifying due/overdue invoices.
* The "On Receipt" option means payment upon receipt of the invoice.
- Due Date = Invoice Date
- No outstanding debt
📌 It is used when:
- Collecting payment immediately
- Fixed fees, online service, setup fee
* Within 1 Week: Payment must be made within 7 days of the invoice date.
📌 Example:
- Invoice Date: 02/02
- Due Date: 09/02
* The remaining values are understood similarly to the "Within 1 Week" value.