
1. How to show list of vendors in dotBizX.Com?
To do it, you click on Vendors (1) menu so you can see the list of vendors like Illustration 01 bellows.
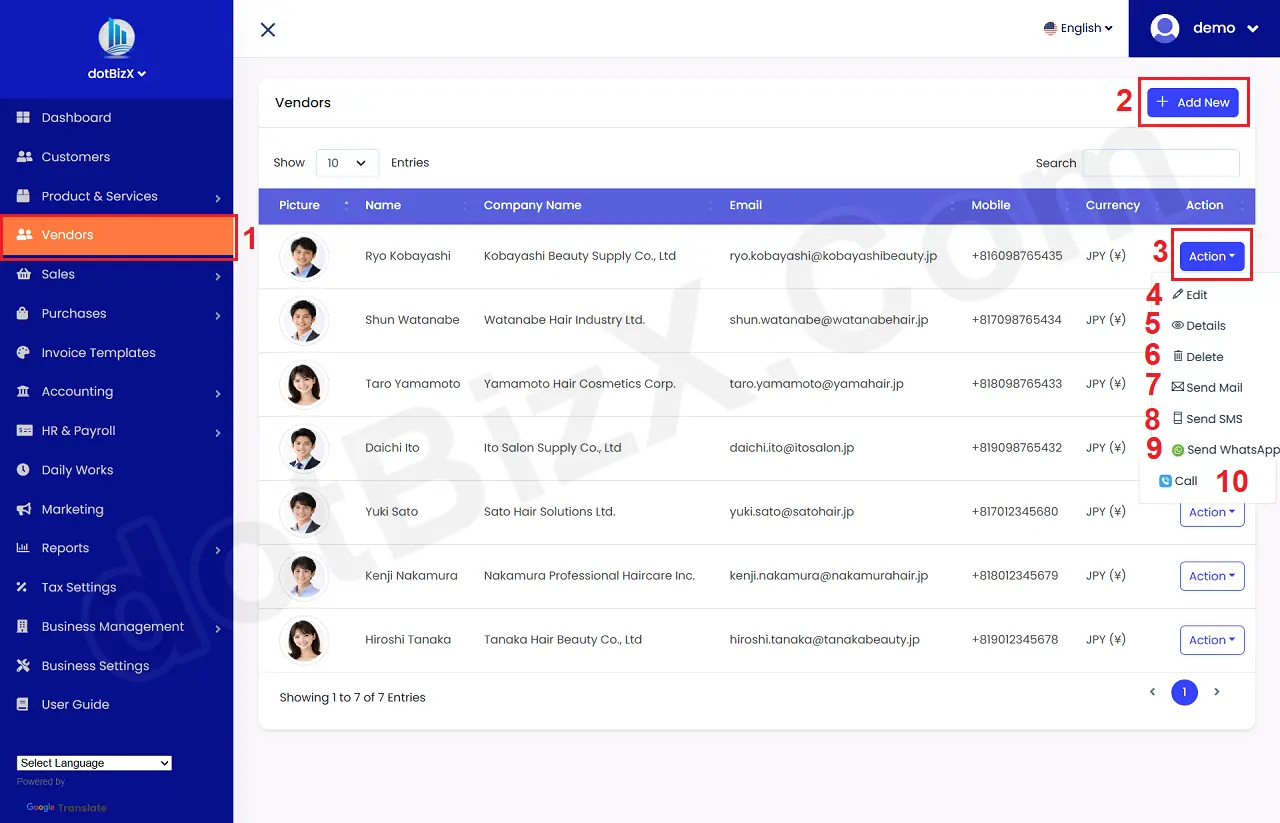
Illustration 01: List of Vendors
* Notes:
+ Add New (2) button: It's used to create a new vendor.
+ Action (3) button: When you click on this button so you can see more options from 4th to 10th position like Illustration 01 above.
+ Edit (4) option: It's used to modify the information about vendor.
+ Details (5) option: It's used to show all information about vendor.
+ Delete (6) Option: It's used to delete a vendor.
+ Send Mail (7) option: It's used to send mail for your vendor.
+ Send Sms (8) option: It's used to send sms for your vendorfrom your mobile when you work with dotBizX.com from your mobile.
+ Send WhatsApp (9) option: It's used to send WhatsApp Chat for your vendor.
+ Call (10) option: It's used to call for your vendorvia the suitable app from your mobile when you work with dotBizX.com from your mobile.
2. How to add new vendor in dotBizX.Com?
In list of vendors like Illustration 01 above, you click on ADD NEW (2) button => next you input all things about your vendor into Add New Vendor form like Illustration 02 bellows => final, you click on Save Changes () button to finish.
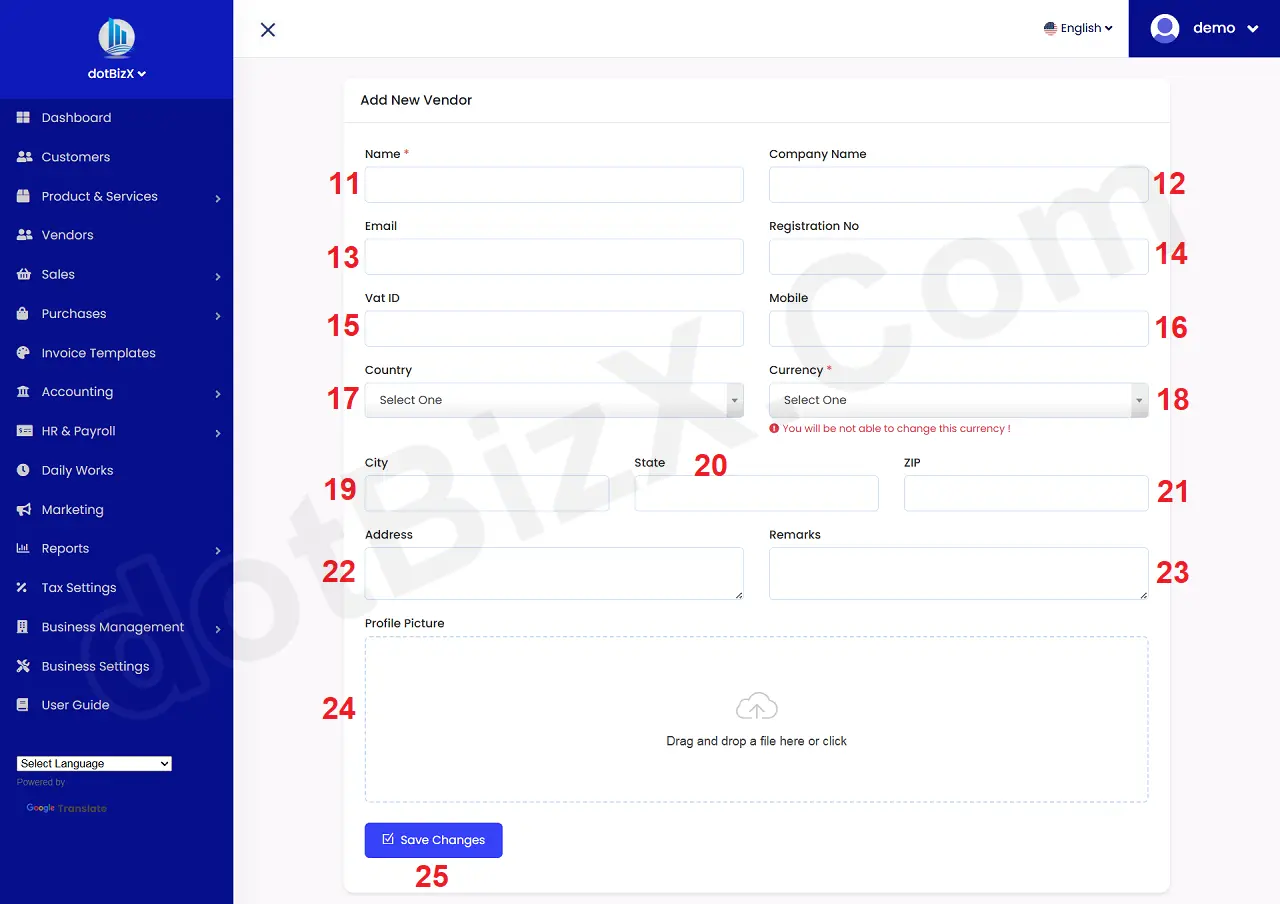
Illustration 02: Add a new Vendor
* Notes:
+ Cells marked with a red asterisk (*) are mandatory.
+ With the Currency field, once you've selected the currency for your Vendor, you won't be able to change its value later.
+ The Profile Picture is an image with a maximum size of 300kb.
+ If you want to import vendors in bulk from Excel File, so you can do it follow this article: 4.2 Import Vendors In Bulk. of the user guide of dotBizX.Com.
3. How to show an existing vendor?
In list of vendors like Illustration 01 above, you click on Action (3) button => then you click on Details (5) option => so you can see the vendor details like Illustration 03 bellows.
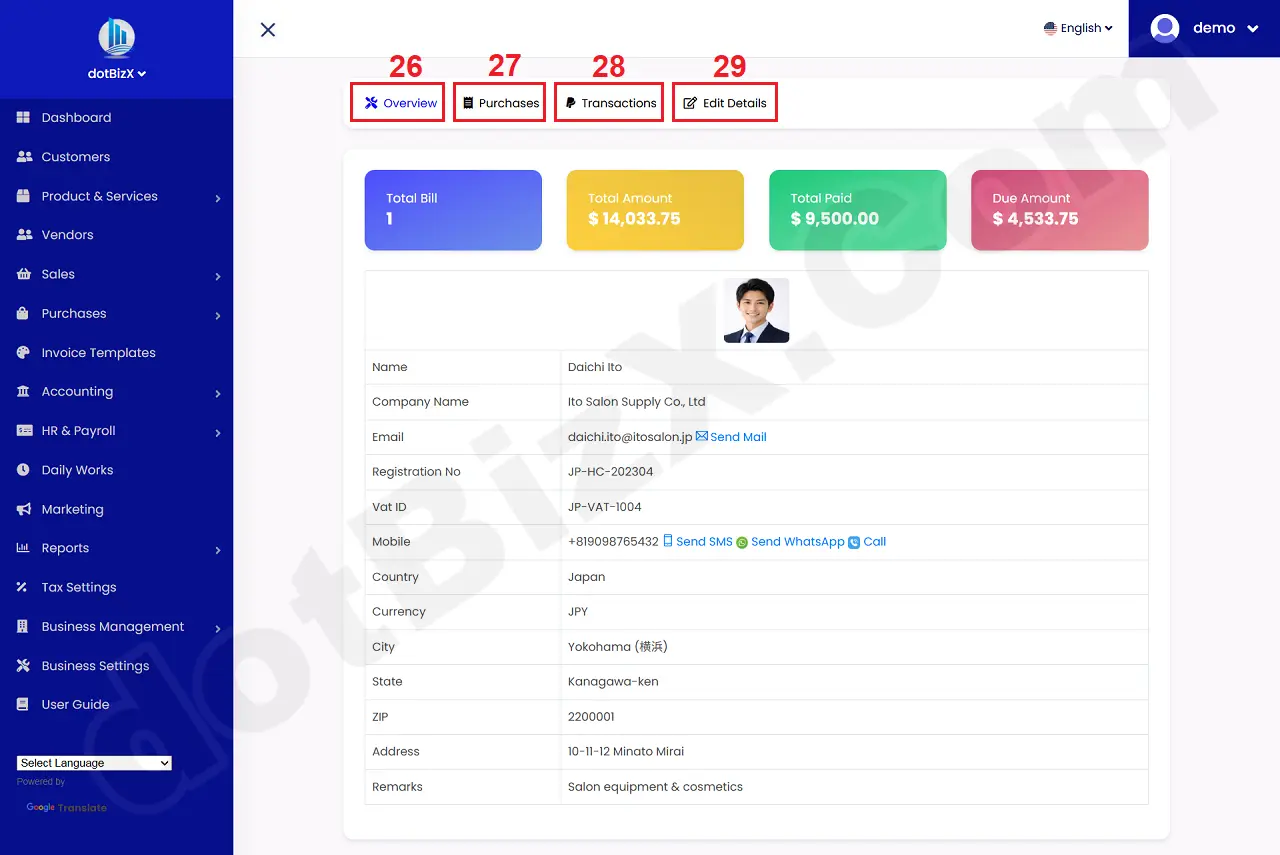
Illustration 03: Vendor Details Form
* Notes:
+ Overview tab (26): It's used to show the Overview of vendor like Illustration 03 above.
+ Purchase tab (27): It's used to show all purchase orders that's suitable with this vendor.
+ Transactions tab (28): It's used to show all Transactions that's suitable with this vendor.
+ Edit Details tab (29): It's used to modify all informations about this vendor.