1. How to show List of Mail Servers in dotBizX.Com?
1.1. Step 1: Open the Dashboard Marketing
To do it, you click on Marketing (1) menu => Then you can see the Dashboard Marketing like Illustration 01 bellows.
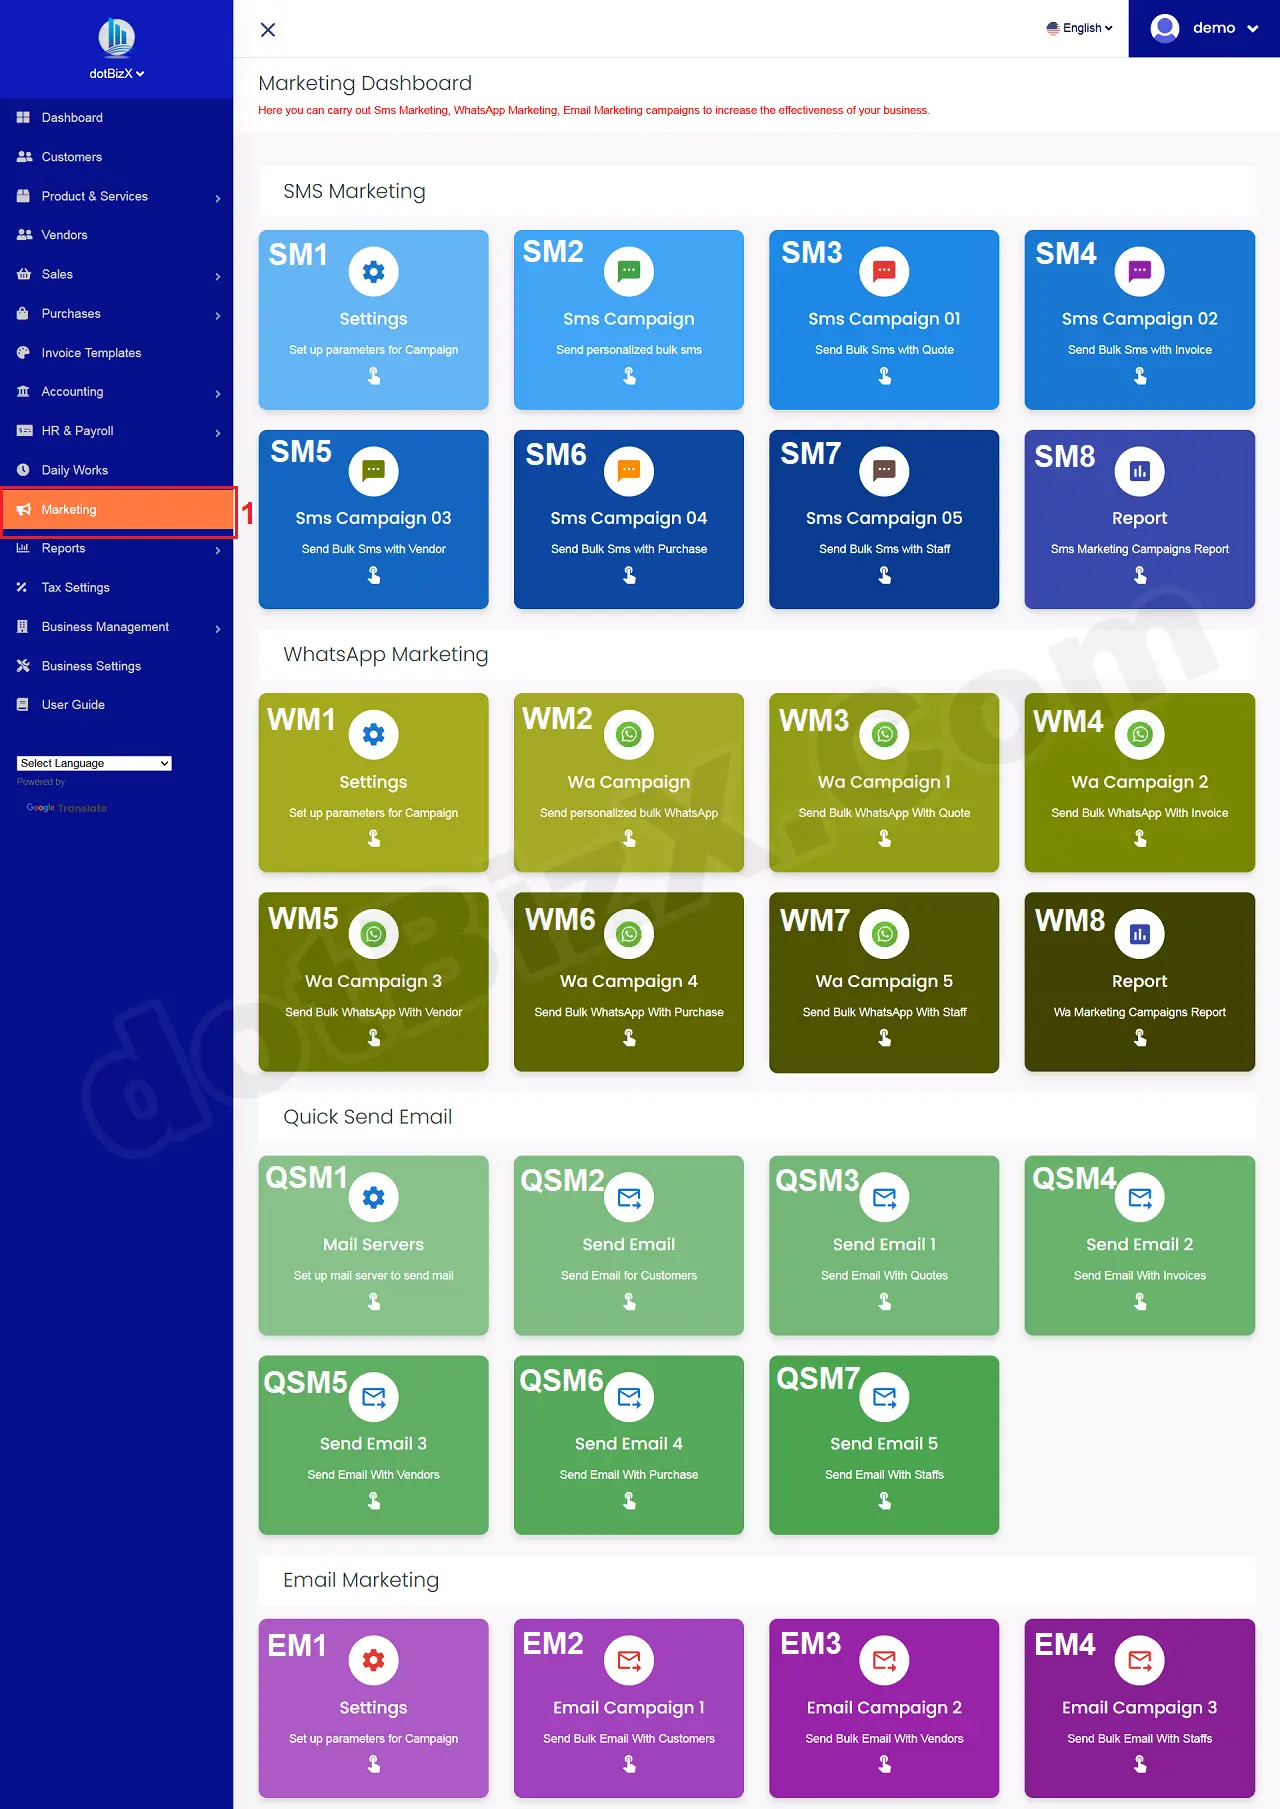
Illustration 01: Interface of Dashboard Marketing
1.2. Open List of Mail Servers
In Dashboard Marketing Form like Illustration 01 above, you click on Mail Servers (QSM1) button => Now you can see List of Mail Servers like Illustration 02 bellows.

Illustration 02: List of Mail Servers
* Notes:
+ Add New (2) button: It's used to create a new mail server.
+ Delete Bulk (3) button: It's used to delete all rows that's selected from the table bellows.
+ 4th red area: It's used filter data about mail servers. This data show in the table bellows. This data's used to send mails in bulk for your customers, vendors, staffs...
+ 5th check box: It's used selected or unselected all rows.
+ 6th check box: It's used selected or unselected the suitable rows.
+ Action (7) button: When you click this button so you can see 8th - 10th options.
+ Edit (8) option: It's used to modify an existing mail server.
+ Details (9) option: It's used to show an existing mail server.
+ Delete (10) option: It's used to delete an existing mail server.
2. How to add a new mail server?
In list of Mail Servers like Illustration 02 above, you click on Add New (2) button => Now you can see the Add New Mail Server Form like Illustration 03 bellows => Next you need input all things for it => Final, you click on Create (22) button to finish.
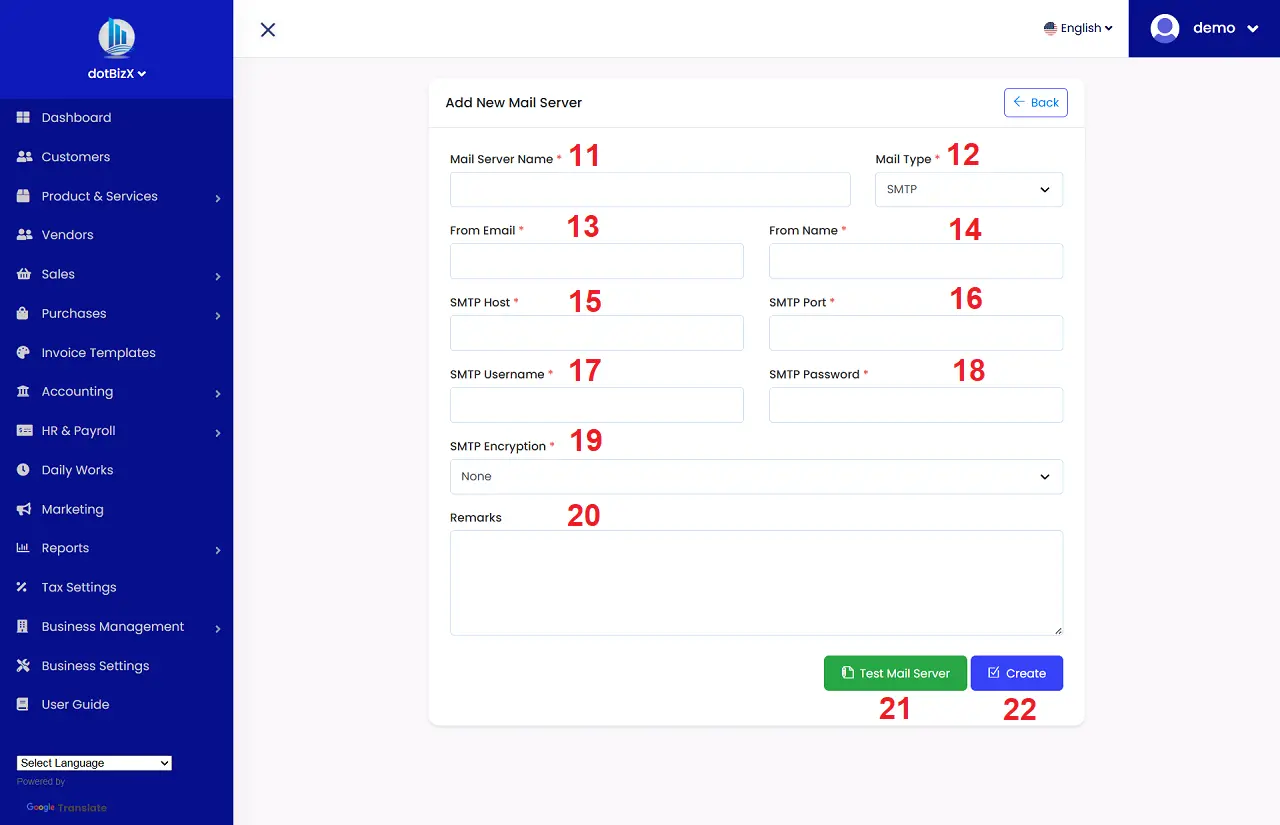
Illustration 03: Add New Mail Server Form
* Notes:
+ Cells marked with a red asterisk (*) are mandatory.
+ Mail Server Name (11) box: It is used to distinguish this Mail Server from other Mail Servers that have been created previously.
+ Test Mail Server (21) button: It is used to check if the mail server configuration you have declared is correct. If it is correct, you will receive the following message: Mail server configured correctly!
+ You can use any mail server that supports the SMTP protocol to declare the information in the form above.
+ Once you've set up your Mail Server, you can use it to send price quotes and invoices to customers, send purchase orders to suppliers, or send payroll notifications to employees, and so on.
For Example:
If I'm using Gmail's free email service, I would specify the details as follows:
+ Mail Server Name: dotBizX.Com
+ Mail Type: SMTP
+ From Email: dotbizx@gmail.com
+ From Name: dotBizX
+ SMTP Host: smtp.gmail.com
+ SMTP Port:
- 465 => SMTP Encryption: SSL
- 587 => SMTP Encryption: TLS
+ SMTP Username: dotbizx@gmail.com
+ SMTP Password: This is the application password for dotbizx@gmail.com
* Note: You do the same for your Gmail addresses.