Roles and Access Rights in dotBizX.Com are essential for maintaining system security and effective user management. By defining clear roles, businesses can control what users are allowed to view, edit, or manage within the platform. In this guide, you will learn how to add new roles, edit existing roles, and delete roles when they are no longer needed, helping you organize permissions efficiently and ensure safe, structured access across dotBizX.Com.
1. How to show list of roles?
You need click on Business Management (1) menu => Roles & Permission (2) => Now you can see the window like Illustration 01 bellows.
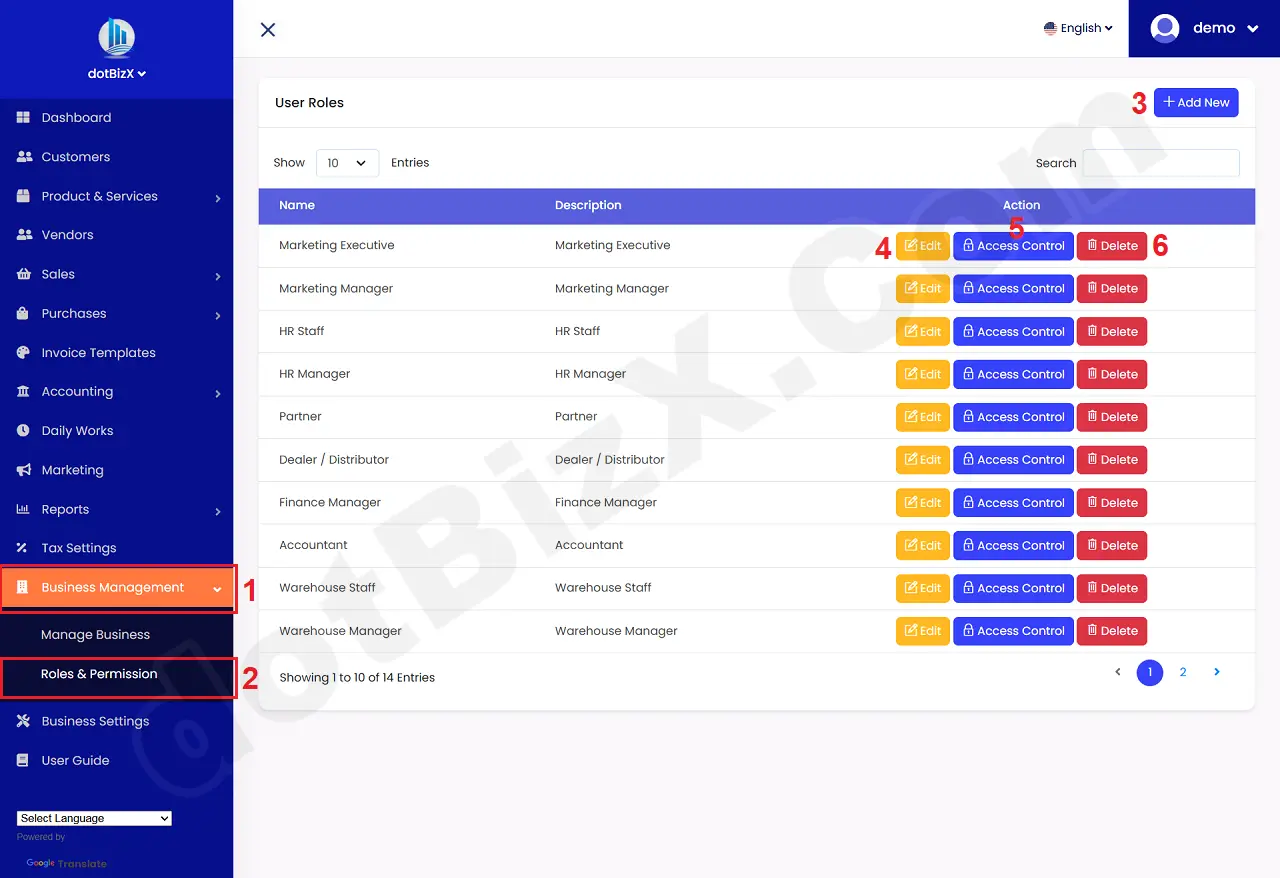
Illustration 01: List of Roles
* Notes:
+ Add New (3) button: It's used to create a new role.
+ Edit (4) button: It's used to modify an existing role.
+ Access Control (5) button: It's used to asign access control for role.
+ Delete (6) button: It's used to delete an existing role.
2. How to create a new role?
In list of roles window, you click on ADD NEW (3) button to create a new role.
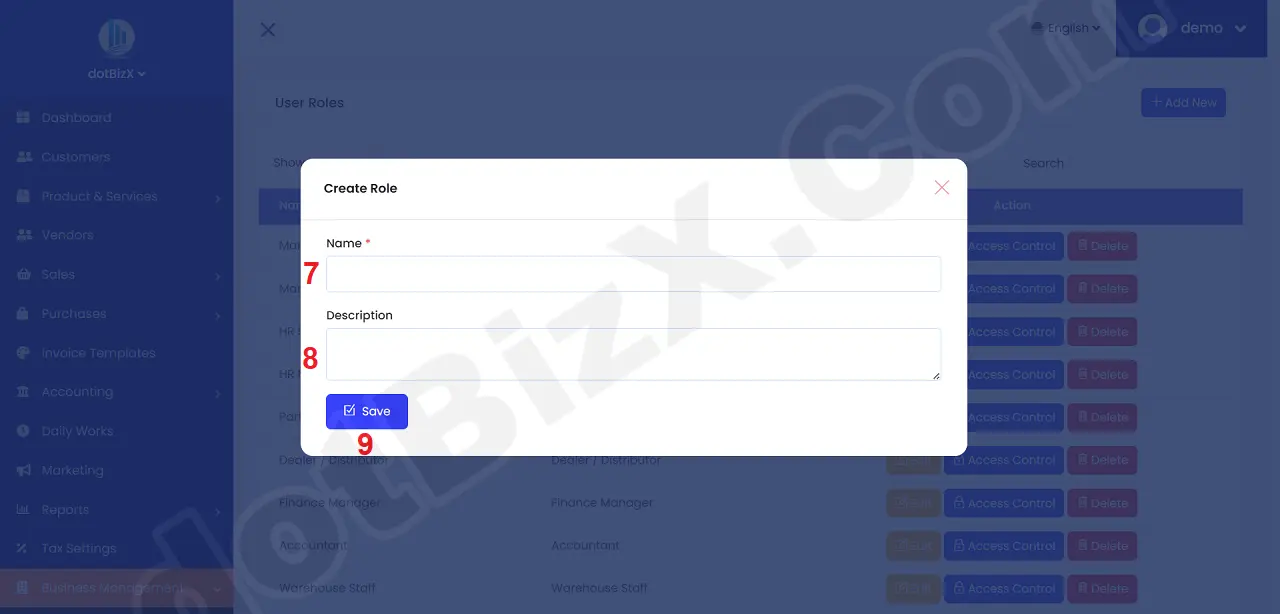
Illustration 02: Add a new Role
3. How to edit an existing role?
In list of Role window, you click on Edit (4) button that's suitable with role which you want to modify => Next, you modify it => Final, you click on UPDATE button to finish.
4. How to delete an existing role?
In list of Role window, you click on Delete (6) button that's suitable with role which you want to delete => Next, you delete it.
5. How to asign access control for a role?
In list of Role window, you click on Access Control (4) button that's suitable with role which you want to process => Next, you asign access control for it => Final, you click on SAVE PERMISION (72) button to finish.

Illustration 03: Asign Access Control For Role
* Notes:
+ LIST option: It's checked so User can see All information of that module.
+ CREATE option: It's checked so User can create a new one.
+ EDIT option: It's checked so User can Modify an existing one.
+ SHOW option: It's checked so User can show an existing one.
+ DESTROY option: It's checked so User can Delete an existing one.
+ Utp Addons Dashboard (39):
- SUB MODULES LEADER: It's checked so User is leader then User can see all things of his staffs with Utp Addons modules.
- SHOW CUSTOMER CONTACT: It's checked so User can see the customer's contact.
- SHOW FULL CUSTOMER LIST: It's checked so User can see list of customers.
- SHOW VENDOR CONTACT: It's checked so User can see the vendor's contact.
- SHOW FULL VENDOR LIST: It's checked so User can see list of vendors.
- SHOW STAFF CONTACT: It's checked so User can see the staff's contact.
- SHOW FULL STAFF LIST: It's checked so User can see list of staff.
- DAILY WORKS SHOW: It's checked so User can see list of daily works of staffs.
- MARKETING SHOW: It's checked so User can see all marketing campaigns.