1. How to show list of recurring invoices in dotBizX.Com?
To do it, you click on Sales (1) menu => next you click on Recurring Invoices (2) Option => Now you can see the list of recurring invoices like Illustration 01 bellows.
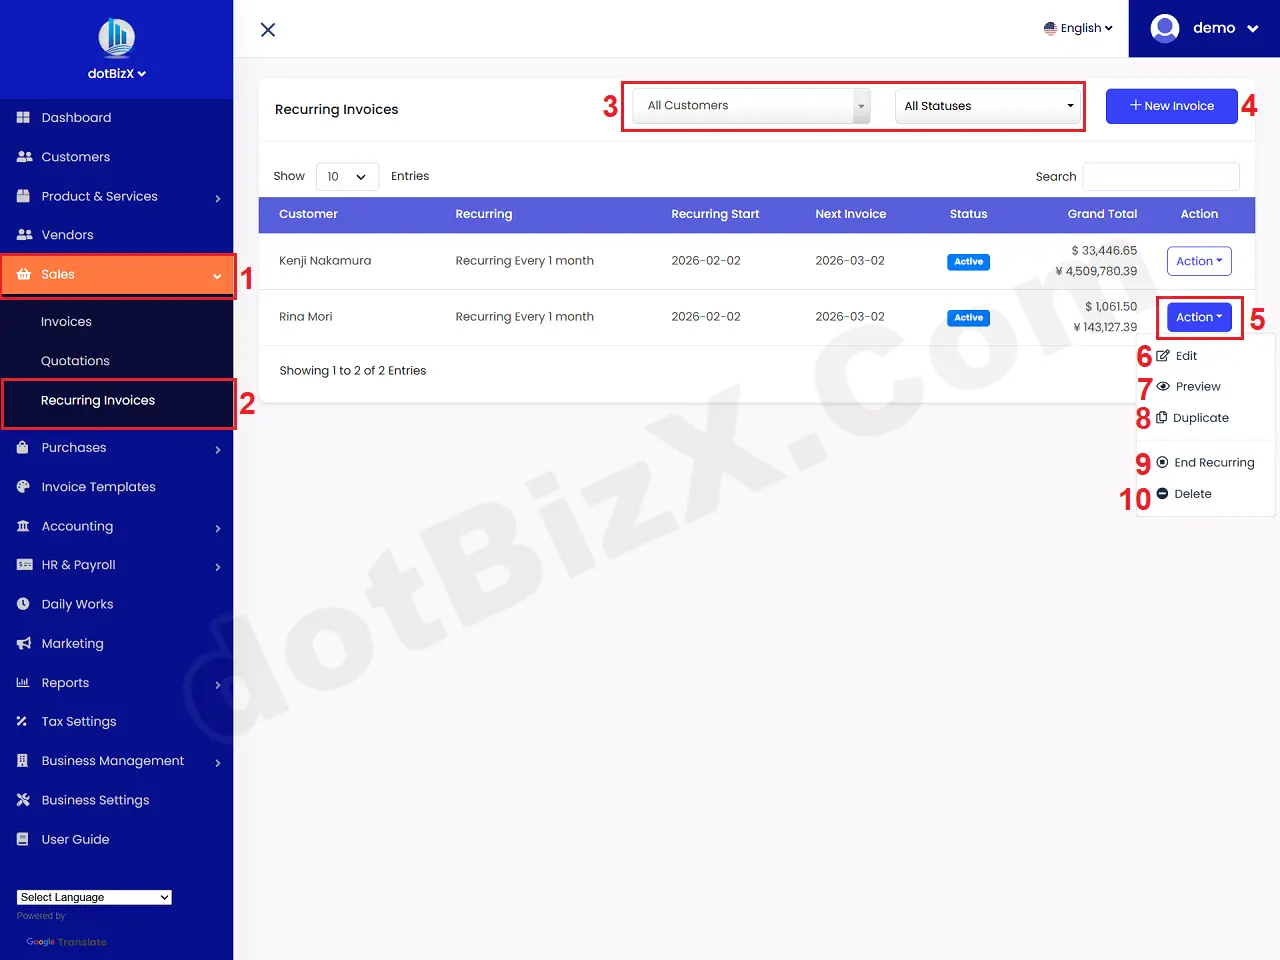
Illustration 01: List of Recurring Invoices
* Notes:
+ 3rd red box: You need to filter data via customers and status of recurring invoices.
+ New Invoice (4) button: It's used to create a new recurring invoice.
+ Action (5) button: When you click on this button so you can see all options from 6th to 10th.
+ Edit (6) option: It's used to modify an existing recurring invoice.
+ Preview (7) option: It's used to show an existing recurring invoice.
+ Duplicate (8) option: It's used to duplicate an existing recurring invoice.
+ End Recurring (9) option: It's used to end an existing recurring invoice.
+ Delete (10) option: It's used to delete an existing recurring invoice.
2. How to add new recurring invoices?
In list of recurring invoices like Illustration 01 above, you click on New Invoice (4) button => In New Recurring Invoice Form like Illustration 03 bellows, you need input all things for it => Final, you click on Save Invoice (17 or 35) button to finish.
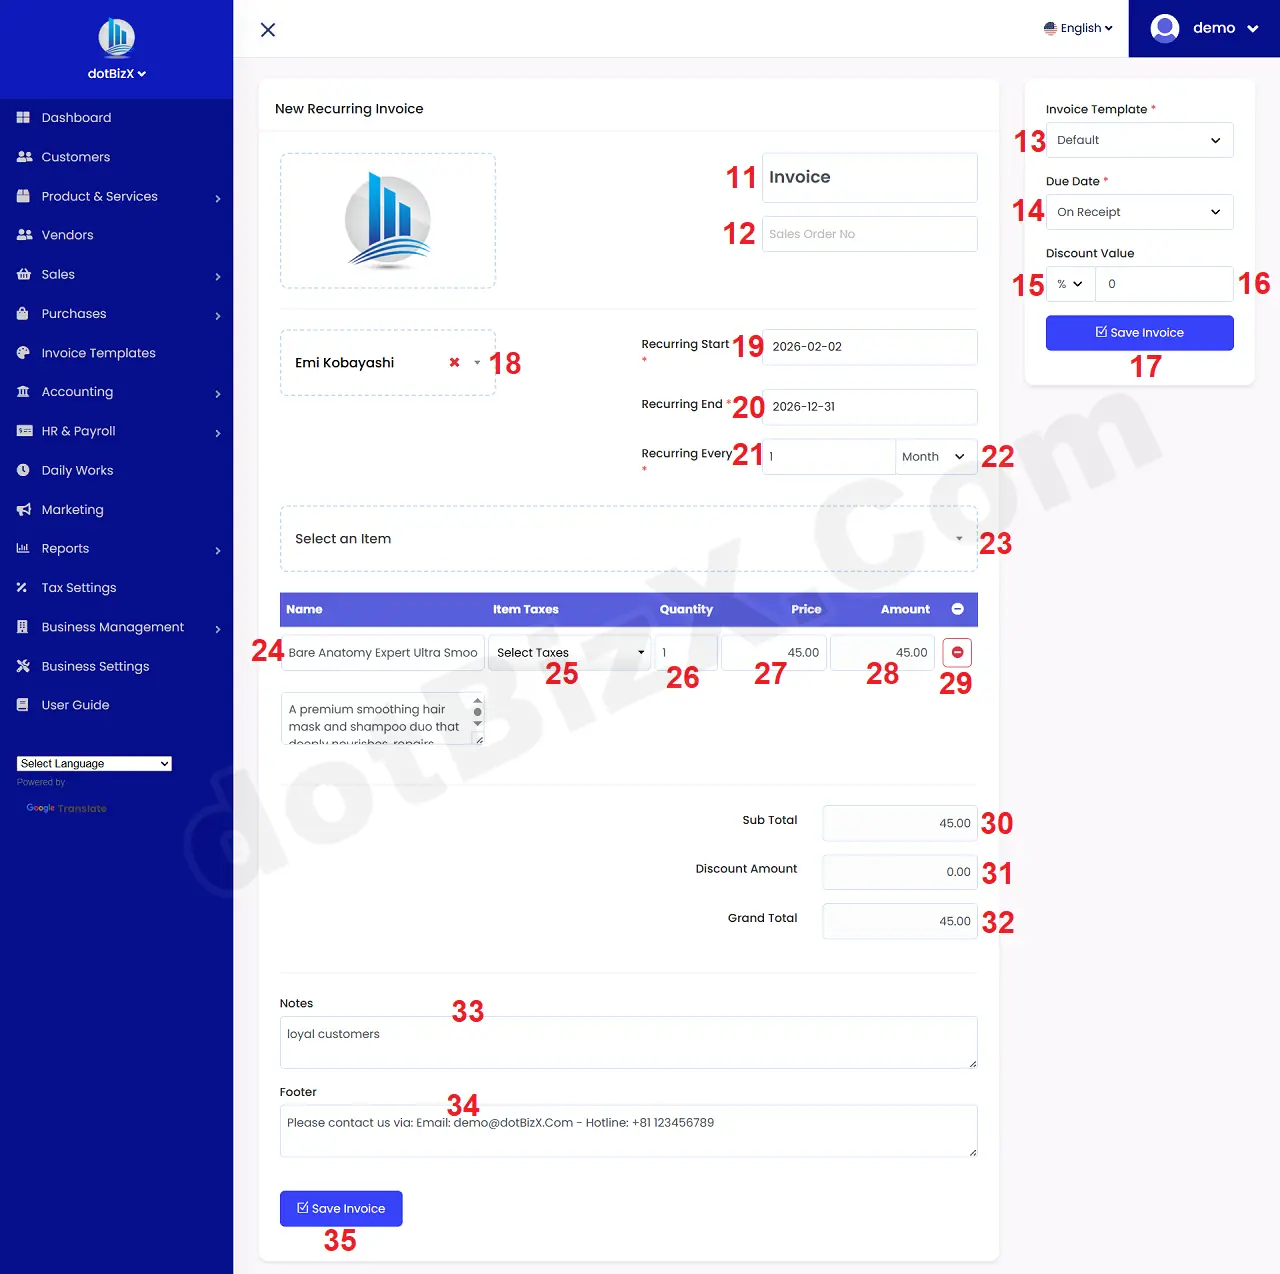
Illustration 02: New Recurring Invoice Form
*Notes:
+ Cells marked with a red asterisk (*) are mandatory.
+ Invoice Title (11) box: You need change your invoice title here.
+ Sale Order No (12) box: You can leave this field blank. If the Invoice was created based on a previous sales order (SO), enter the SO here.
+ Recurring Start (13) box: You need input Start Invoice Date for it.
This is the time the system will automatically generate an invoice. After this date, the system will: Create a new invoice, Assign an invoice number, (Depending on the configuration) Send it to the customer. For example: Recurring Start = 2026-02-02 → On February 2nd, 2026, the system will create a new invoice.
+ Recurring End (14) box: You need input Recurring End Date for it.
This is the End Date of the recurring invoice cycle. After this date, the system will stop creating new invoices. For example: Recurring End = 2026-12-31 → Recurring invoices will only run until December 31, 2026, and then stop completely.
+ Choose Customer (18) box: You need choose one customer for this invoice.
+ Recurring Every (21 + 22) box: You need input the suitable value for it.
This is the cycle number, indicating how often it repeats. It consists of two parts: a number (e.g., 7, 30, 1…) and a unit (Days / Weeks / Months…).
Common examples:
- Recurring Every 30 Days → Create one invoice every 30 days.
- Recurring Every 1 Month → Create one invoice every month.
- Recurring Every 7 Days → Create one invoice every week.
Practical example (easy to understand):
- Next Invoice Date: 2026-02-02
- Recurring Every: 1 Month
- Recurring End: 2026-06-02
👉 The system will generate invoices on:
- 02/02
- 02/03
- 02/04
- 02/05
- 02/06
→ Then it will automatically stop.
+ Due Date (14) box: You need choose the suitable value form it.
This is the Payment Due Date. It is used for: Tracking accounts receivable, reminding payments, Identifying due/overdue invoices.
* The "On Receipt" option means payment upon receipt of the invoice.
- Due Date = Invoice Date
- No outstanding debt
📌 It is used when:
- Collecting payment immediately
- Fixed fees, online service, setup fee
* Within 1 Week: Payment must be made within 7 days of the invoice date.
📌 Example:
- Invoice Date: 02/02
- Due Date: 09/02
* The remaining values are understood similarly to the "Within 1 Week" value.
+ Select an Item (23) box: You need to choose products or services for your customer. After that that items'll show in table bellows.
+ Item Taxes (25) Column: You choose the tax that's suitable with that item.
+ Quanlity (26) column: You can change the quanlity of items for your Invoice.
+ Price (27) column: You can change the price for your Invoice.
+ Amount (28) column: You can change the amount for your Invoice.
+ 29th Icon: Click it to delete Item.

Illustration 03: Approve Recurring Invoice Form
In the recurring invoice detail like Illustration 03 above, you need click on Approve (36) button to change its status from Draft to Active.
👉 Therefore, at the scheduled time, the system automatically creates a NEW INVOICE with the information as in Recurring Invoice. This newly created invoice will be in the Invoice List (Sales menu => Invoices option).
3. How to show an existing recurring invoices?
In list of recurring invoices like Illustration 01 above, you click on Action (5) button => Next you click on Preview (7) option => Then you can see the recurring invoice detail like Illustration 04 bellows.
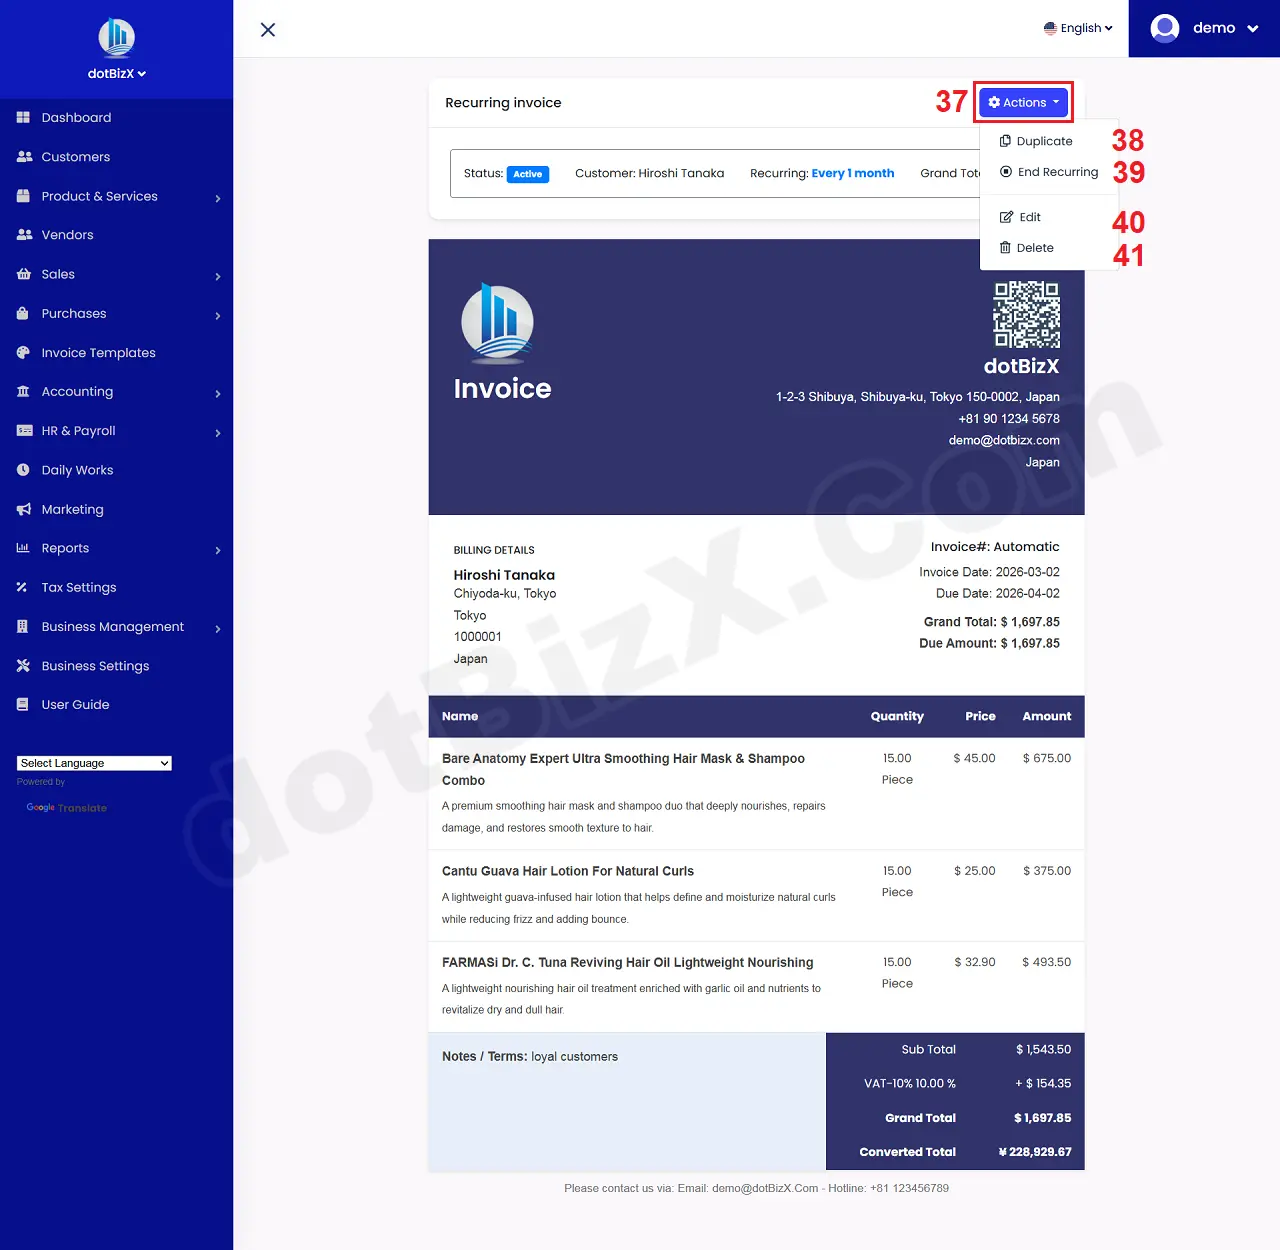
Illustration 05: Recurring Invoice Detail Form
4. How to end an existing recurring invoices?
In list of recurring invoices like Illustration 01 above, you click on Action (5) button => Next you click on End Recurring (9) option => After that The system will stop generating invoices from this Recurring Invoice.
* Notes: Recurring invoices will also stop when the Recurring End date is exceeded => At that point, the system will NOT create any new invoices.